Add Vise
Assembly and Test
Project Beano
A Tale of Two Testfires
Getting Cheeky
Slinging a Different Tune
Conclusion
More articles
The New Barrel
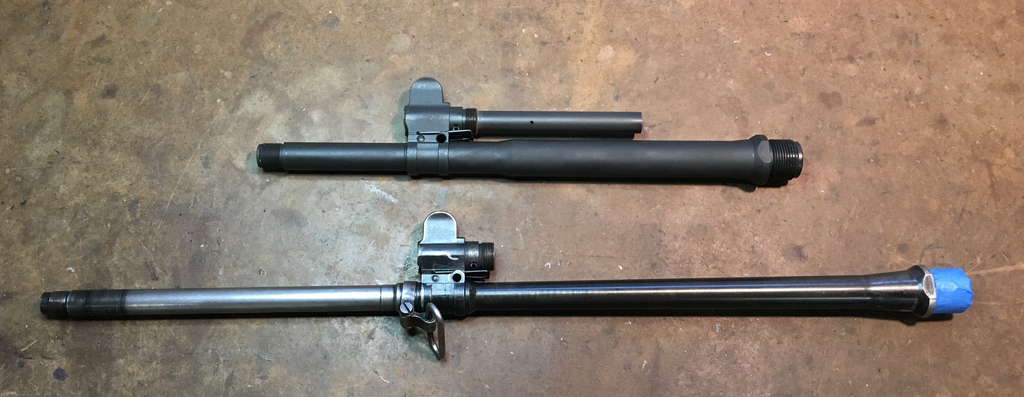
After I got the SBR tax stamp back from the ATF, I ordered a DSA 13" barrel. DSA barrels came with the .308-standard 5/8-24 RH muzzle threading and (more importantly) a 1:10 twist. Given that I intend to fire subsonic rounds out the SBR, a tighter twist than the standard 1:12 you find on surplus barrels would stabilize longer bullets.
Most SBR FALs seem to use 11" barrels, but I went with 13" in the interests of reliability. The longer the bullet stays in the barrel after gas starts feeding into the gas system, the longer the gas has to push on the piston. In order to cycle the action, the piston has to push on the bolt carrier with enough force over enough time; shorten the time, and you need more force; conversely, increase the time and you can get away with less force on the gas piston. All things being equal, less force over more time usually produces less finicky operation and greater margins of error. Short-gas FALs extract under much higher pressure than standard-gas FALs, so the extractor really has to yank on the case rim. Anything that makes that yank a little more gentle makes it easier to get reloadable cases--and increases the operating margins before case rims start getting ripped off.
With all of the above in mind, I called DSA and placed a custom order for a stripped barrel with an undersized gas port. That way I could use my own gas block, and slowly open up the gas port with a drill until the rifle had enough gas to function, but not so much that it extracted too violently. What I actually got was a bit different than expected.
Apparently "stripped barrel" was ambiguous.
The thickness of the barrel was fine; I was actually interested to see what effect it would have on accuracy. What threw a wrench in my plans was the fact that it came with the gas block installed, and a soldered Austrian-style gas tube.
"Fine," I muttered. "At least I won't have to worry about gas blow-by. But how the heck will my barrel vise work with the tube where it is?" The short answer is, it wouldn't. I use a Brownells barrel vise with interchangeable bushings. Although I expected to have to make a custom bushing for DSA's thicker barrel, inclusion of the gas block meant there wasn't enough room between the end of the tube and the front of the receiver. Either the gas block had to come off, or I'd need to build a custom barrel vise.
To paraphrase Sherlock Holmes, when you have eliminated all other possibilities, whatever remains, no matter how much of a pain in the butt it may be, is your only option. I really didn't want to pull the gas block out of concerns with getting it back on aligned properly and without compromising the journal seal. That left the homemade barrel vise as the only option.
Later events would show the irony of making a barrel vise in order avoid removing the gas block. At the time, though, I just tensioned the lathe's drive belt and started rummaging through the aluminum pile.
Good Add Vise
To be fair, I could have just milled off some of the width of the Brownells vise. But I hated the thought of a long painful end-milling session which would only result in a mangled vise. Besides, making a vise sounded like fun. I started by sawing a couple pieces of aluminum stock to rough dimensions.
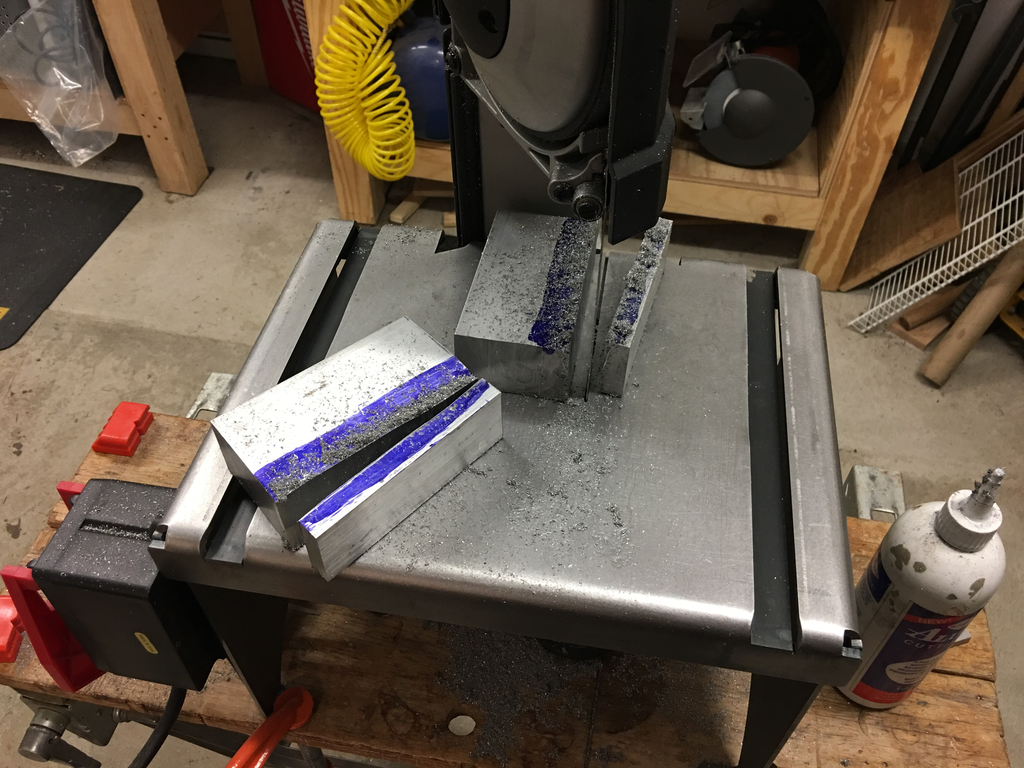
I saw what I did there.
I milled the sawed side level, then laid out the locations for the screws that would hold the two blocks together. Because both of the short sides had been sawed, a square was used to get the holes aligned along the short axis.
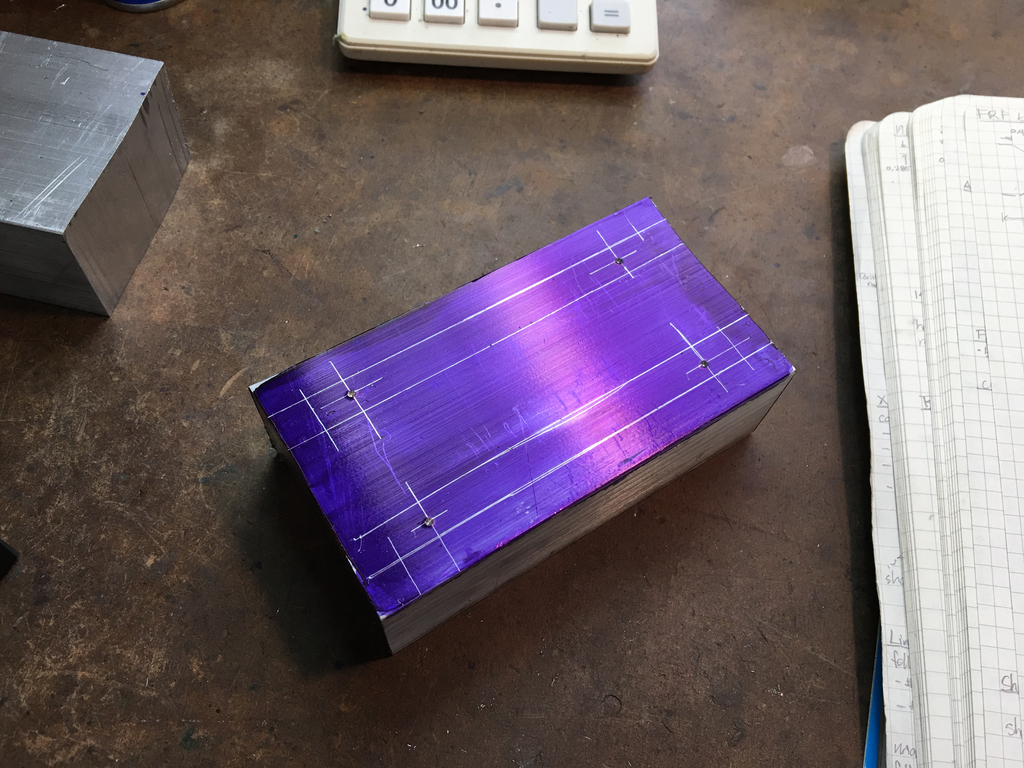
Looks deceptively organized.
After drilling the top block, I transferred the hole location...
...and tapped the holes.
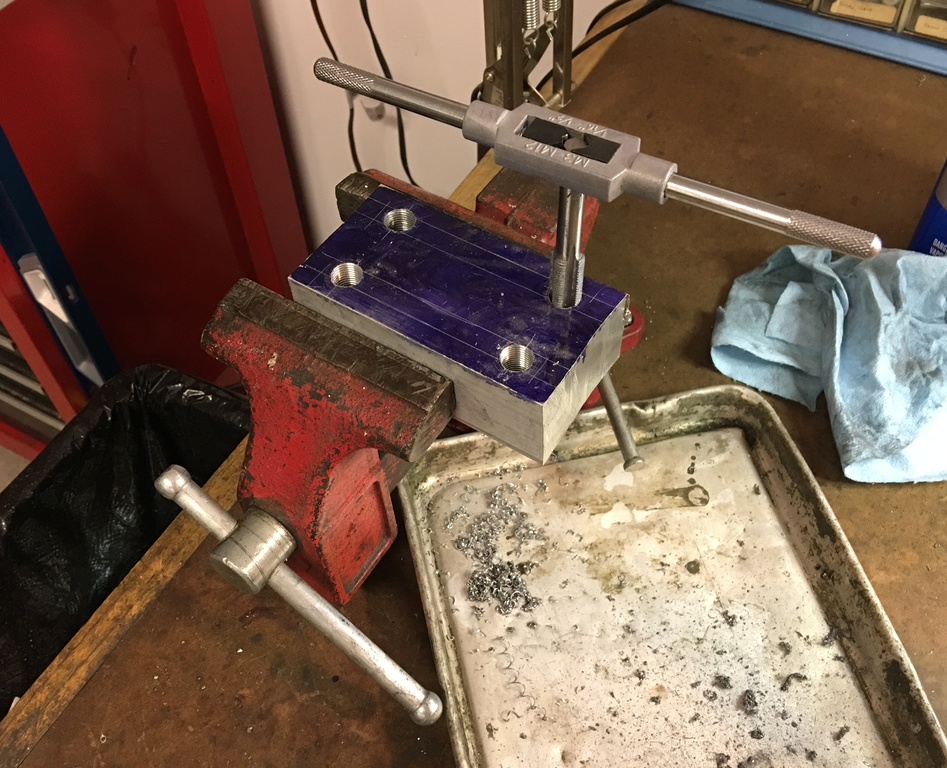
Tapping holes that deep, even through aluminum, was a long and painful process. Literally painful: I used poor technique while tapping and gave myself a nasty case of tendonitis which has persisted until the time of this writing. Guess it's true what they say: Guns hurt people.
Beautiful threads, but at what cost?
The block with the tapped holes is the bottom block. The top block just needs clearance holes and countersinks for the tap screws. Countersinks aren't technically necessary, but I wanted the extra length of thread engagement, especially given that the screws would be threading into aluminum. Also, it would look cool, and for once I wanted to make a tool that didn't look like it was made by protohumans. I didn't take any pictures of the countersinking process, which was just a lot of step-drilling on the drill press.
Having already made this concession to aesthetics, I continued by bolting the blocks together and facing them in the lathe. That was pretty fun.
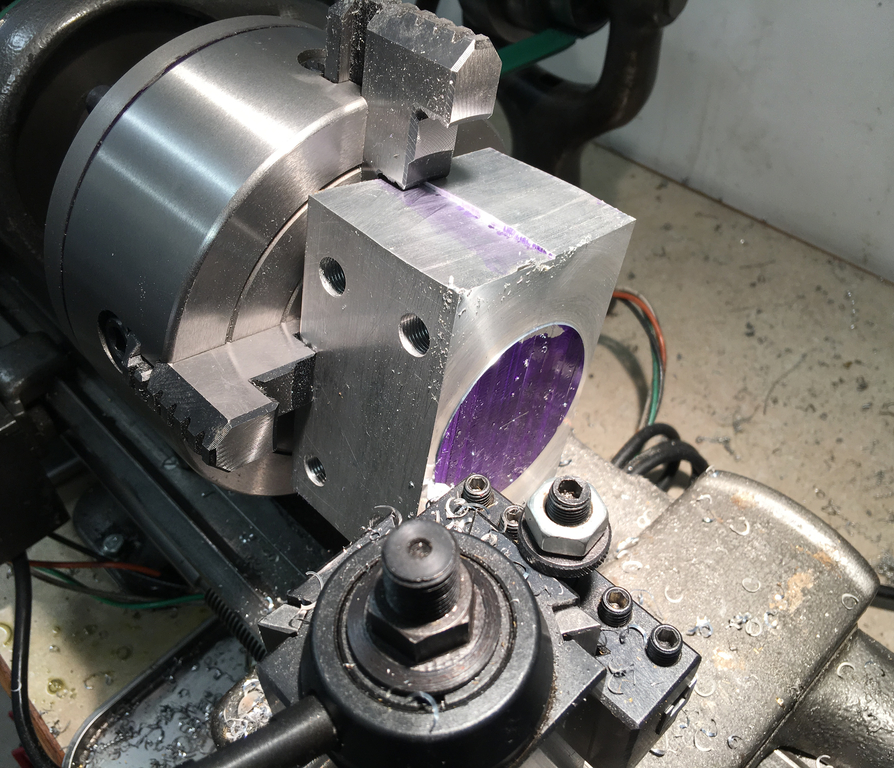
Finishing the center is almost worth the interrupted cut the preceded it.
Canny observers of the above photo noticed the scribed reference line and centerpunched hole where the clamped-together blocks will be bored. I didn't take pictures of that process because removing so much material was, well, boring. I did take a photo of boring the barrel bushing for the vise, though.
You know the drill.
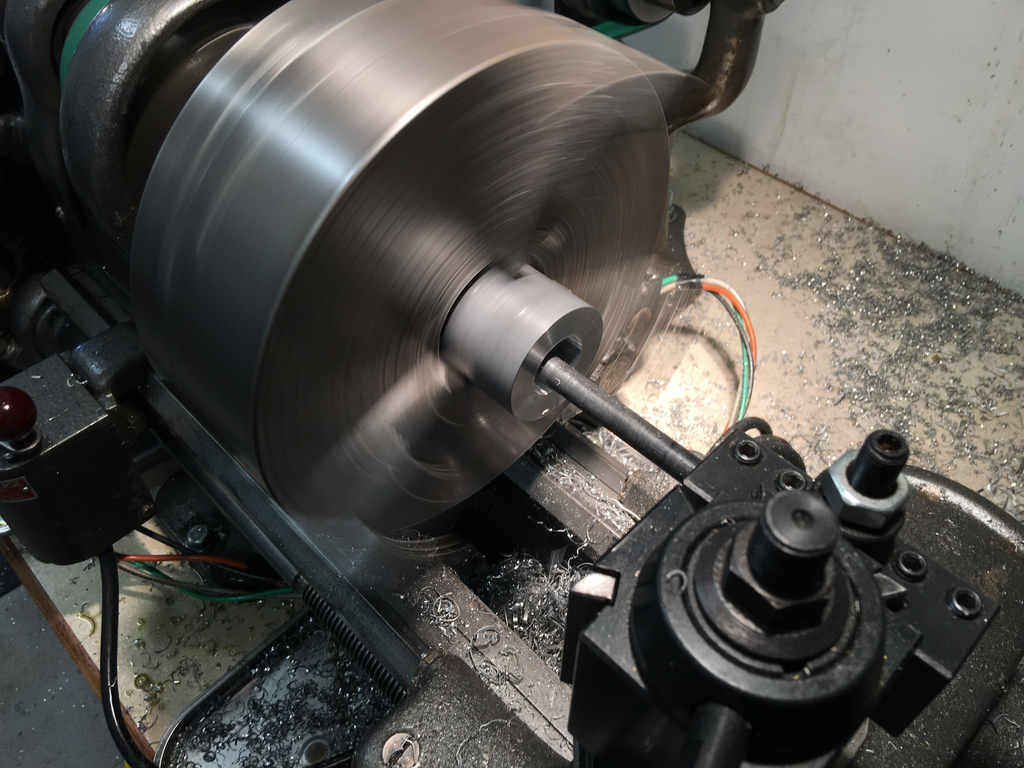
Given the tight clearances involved, the bushing needed a taper on one end to mate with the taper on the end of the DSA barrel. To find out what this taper was, I mounted the barrel between centers and measured the taper height vs. length using a dial indicator and scale on the ways.
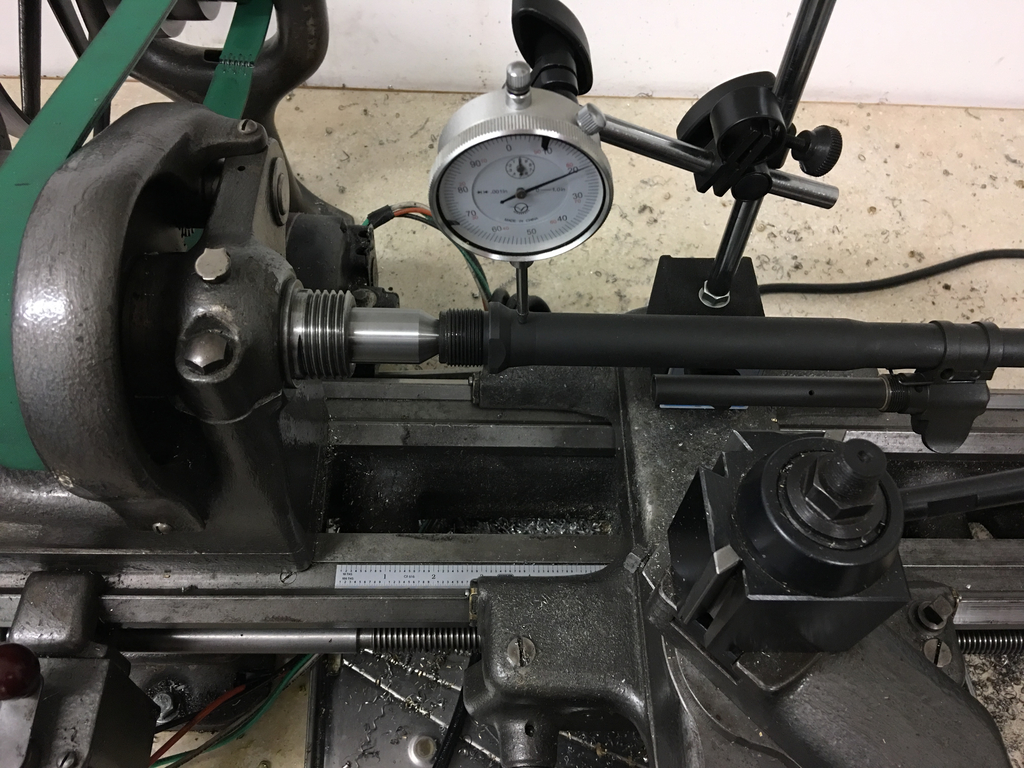
A whole lot of setup for what turned out to be a 45 degree taper.
As it turned out, the taper wasn't even necessary as long as there was a bit of relief. Good thing, since I didn't take any pictures of the taper operation. Also not photographed is splitting the bushing and various bits of cleanup on the vise. It looked so good once complete, though, that I had to take a couple photos.
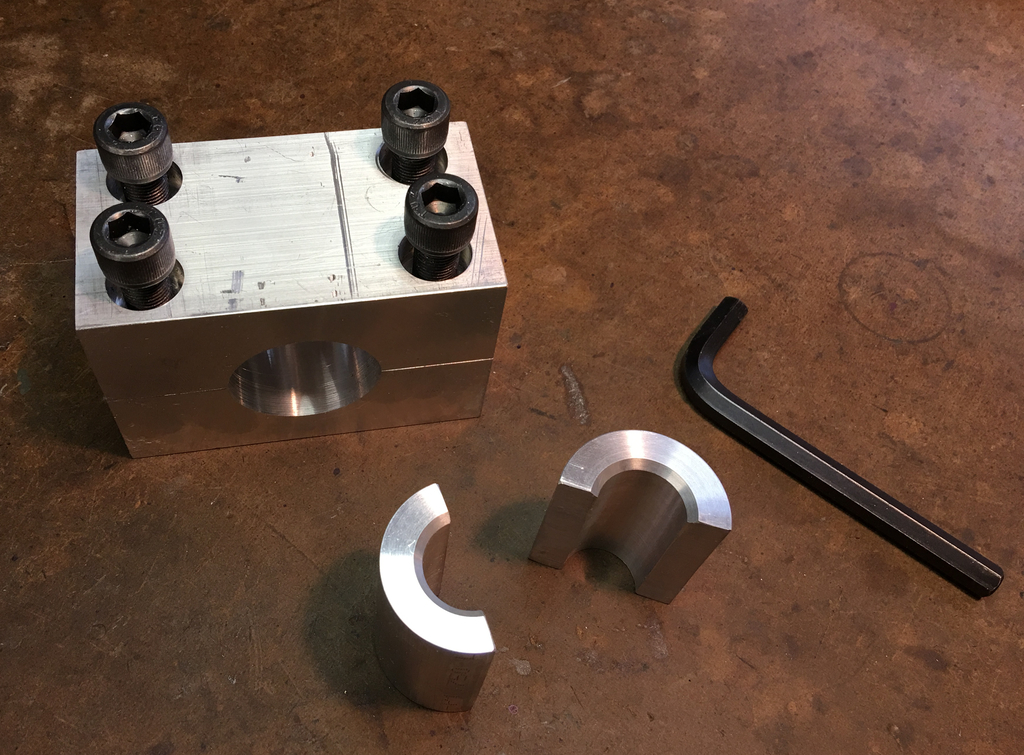
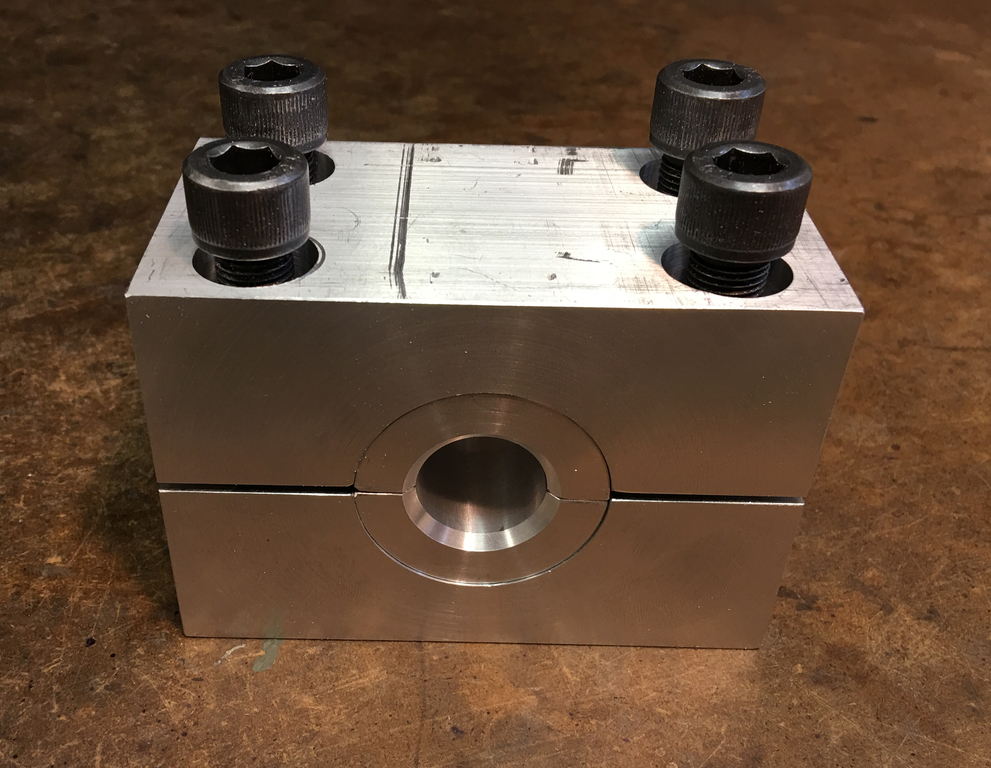
Readers may be wondering why I went to the trouble of overboring the vise, then making a bushing for the barrel. Although making things unnecessarily hard on myself is a common theme in my projects, in this case there are some good reasons. First, by using a bushing it makes the vise applicable to other barrels which provide too little clearance for the Brownells vise. The real reason I used a bushing, though, was because I was originally going to bore the vise just for the FAL barrel--but screwed up and made the hole too big. The fix was to overbore it and make a bushing. Good thing the bushing stock was already on hand from back when I thought it might be possible to use the Brownells vise.
Barrelling
Once the vise was complete, barrelling the FAL was able to proceed according to the usual technique I use. The barrel is clamped in the barrel vise and a receiver wrench attached to the receiver, with a section of charging handle installed in the charging handle slot to prevent the wrench from crushing anything. Alignment is done with a digital level. A flat surface is provided in the rear by a steel block that clamps into the receiver, aligning the level with the interior raceways. In the front, I use a gizmo that lines up with the front sight and clamps (tenuously, in the case of an SBR) onto the barrel.
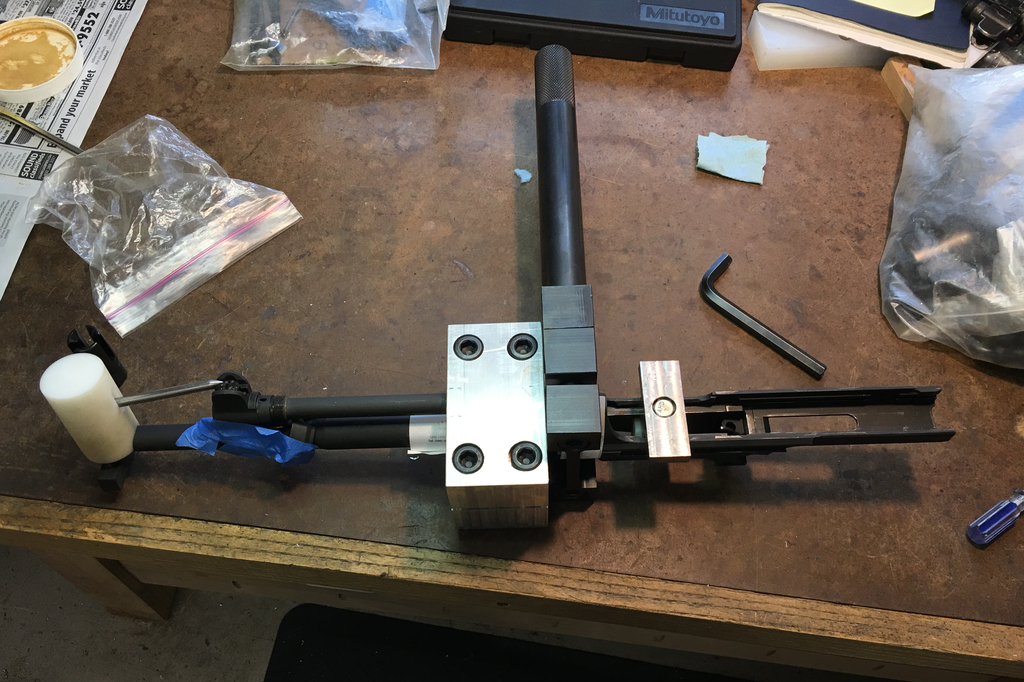
Cozy.
A 12-ton shop press provides the clamping force. Sometimes not quite enough clamping force, but the nice thing about digital levels is that they can be zeroed, making the actual angle of the barrel and receiver nearly irrelevant.
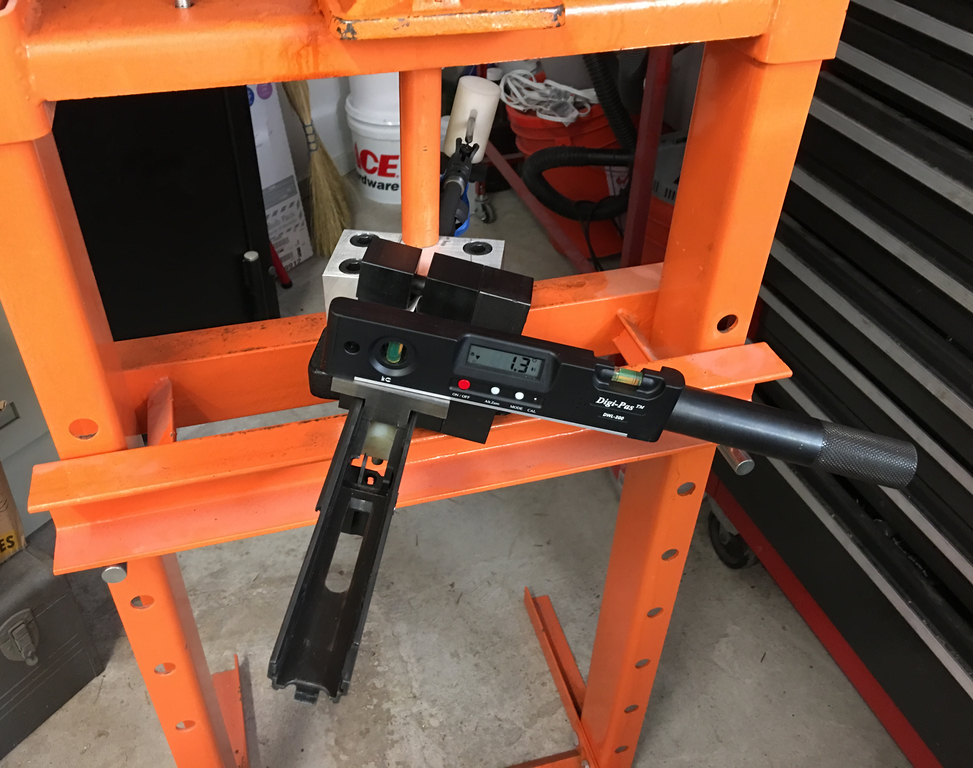
"Level" is such a relative term.
Barreling followed the typical process:
- Assemble vise and alignment gauges.
- Torque the barrel on.
- Remove the vise and alignment gauges.
- Realize that I must have been holding the levels wrong because the barrel is visually misaligned.
- Swear floridly.
- Reassemble the vise and alignment gauges.
- Untorque the barrel.
- Retorque the barrel, this time being really sure that it's lined up right.
- Remove the vise and alignment gauges.
- Realize that you forgot to put the handguard ring on the barrel.
- Swear floridly.
- Return to step 1.
Eventually the infuriating process came to an end with a barrel aligned to both visual and digital standards. The comically short piston dropped freely into the receiver, which is important--you don't want anything off-center at tens of thousands of PSI.
It was time to assemble the rifle and test fire it.
email: hidi.projects@gmail.com