Add Vise
Assembly and Test
Project Beano
A Tale of Two Testfires
More articles
The Gas Plug Option
To fix an overgassed FAL, one must reduce the amount of gas getting to the gas piston. (Stay tuned for further brilliant insights.) The easiest way to do this is by modifying the gas plug that channels gas through the gas block to the head of the piston.
Welding up the hole in the side of the plug and redrilling it to a smaller diameter will reduce gas flow to the piston. It's a common modification for those who put a suppressor on their FALs; just swap out the gas plug when the can goes on and the FAL will handle the additional backpressure without having to touch the regulator settings.
However, welding the gas plug didn't seem like the right approach for fixing an overgassed barrel. It made reliable functioning dependent on a replaceable part instead of fixing the problem at its source.
Welding up the gas port in the barrel is another option, but it's not for the faint of heart or lacking of welder, so that left the gas block as the only remaining place where gas flow could be restricted.
Bushing the Gas Block
Inserting a bushing into the gas block is not the simplest process in the world but, fortunately for me, it doesn't require great skill. Still, I practiced first with a junker DSA gas block that had been mangled by a burr on assembly. All photos are of the practice run, so if you're wondering about what appears to be a burr, that's why. The actual gas block used exactly the same process, but with additional steps at the start and end.
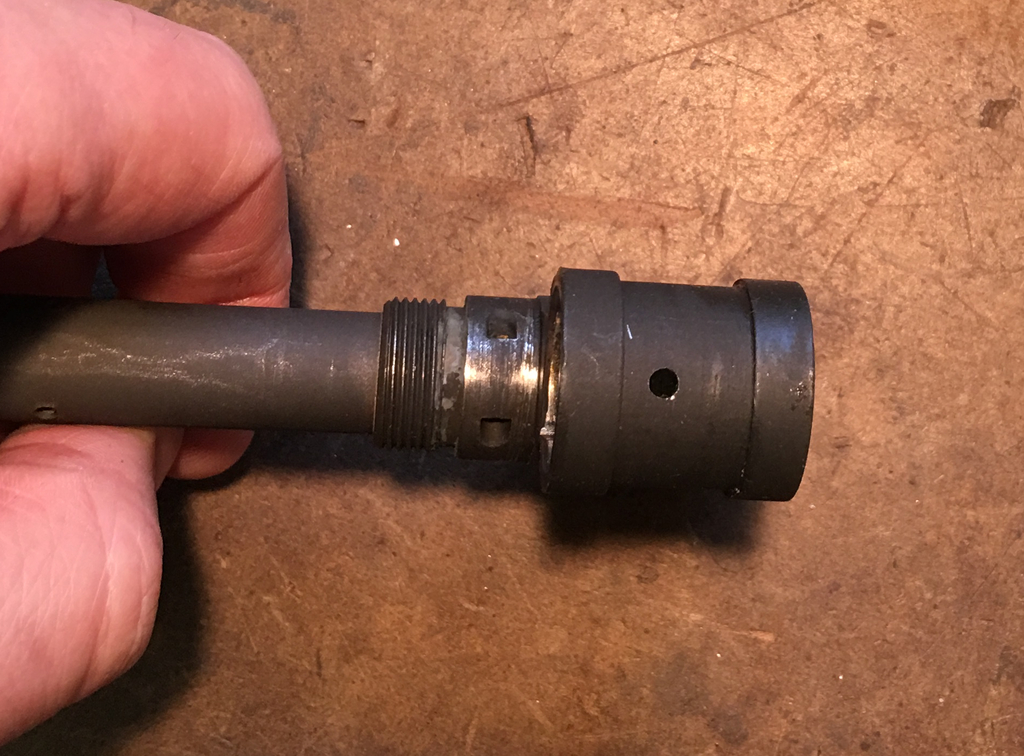
Removing the Gas Block
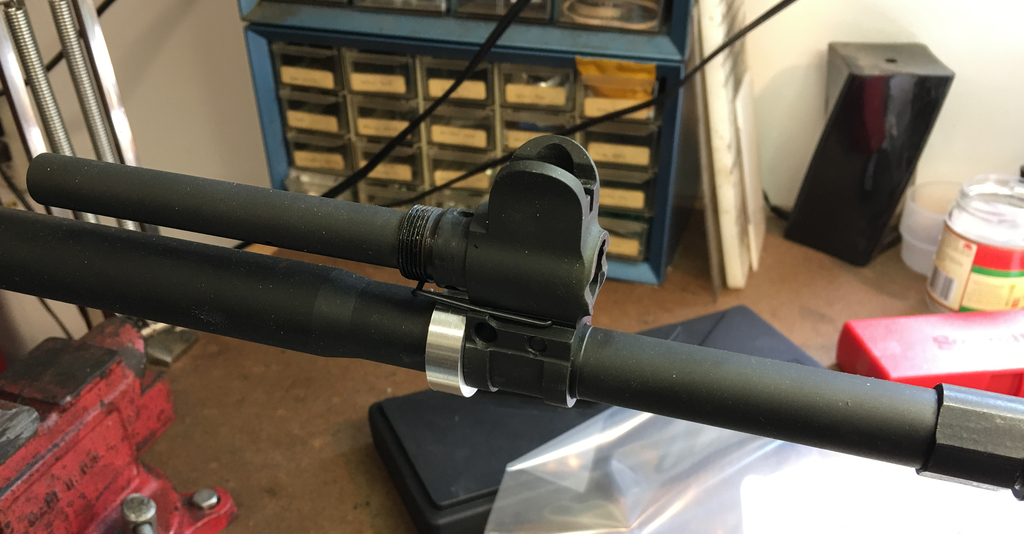
The first additional step consisted of removing the gas block. I opted to press the block off the rifle from the muzzle.
Significantly easier to remove the gas block when it's not pinned in place.
After removing the pin, I made a brass insert for the muzzle to protect it from the press ram.
I also turned a collar to engage the rear edge of the gas block where it met the barrel. It was turned from an aluminum rod and then cut in half so it would fit around the barrel.
Any excuse to turn aluminum.
I just collar like I see 'er.
The aluminum collar rested between a couple arbor plates. One could theoretically just butt the arbor plates directly against the gas block, but you'd get fewer points of contact and a greater chance of scraping the barrel. You'd also miss an opportunity to spend an excessive amount of time making a tool that will only be used once.
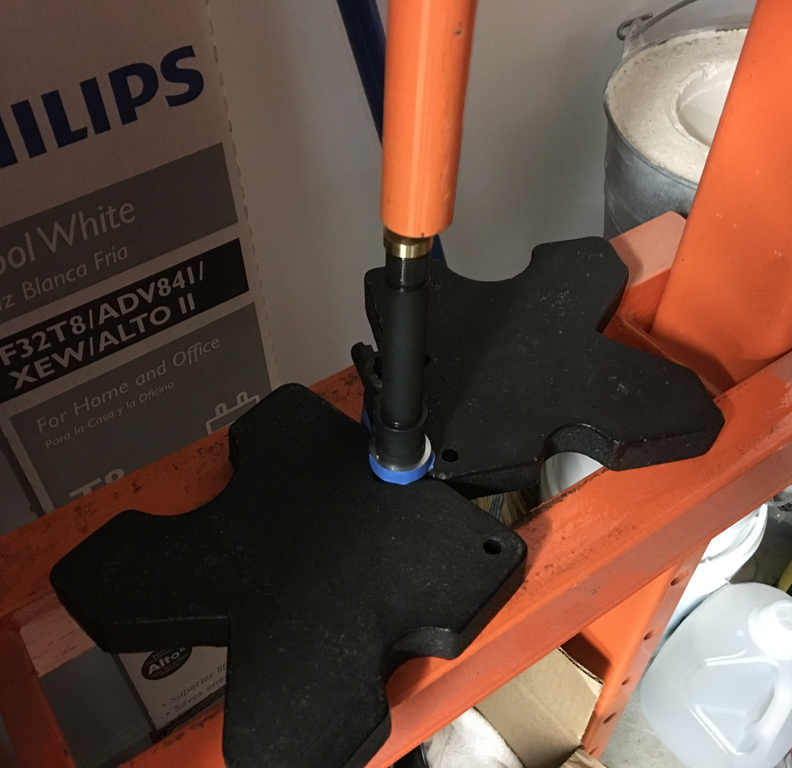
Engage safety squint!
Pressing went without a hitch. Exhibiting uncharacteristic foresight, I lined a box with soft rags to catch the receiver and barrel when it dropped free.
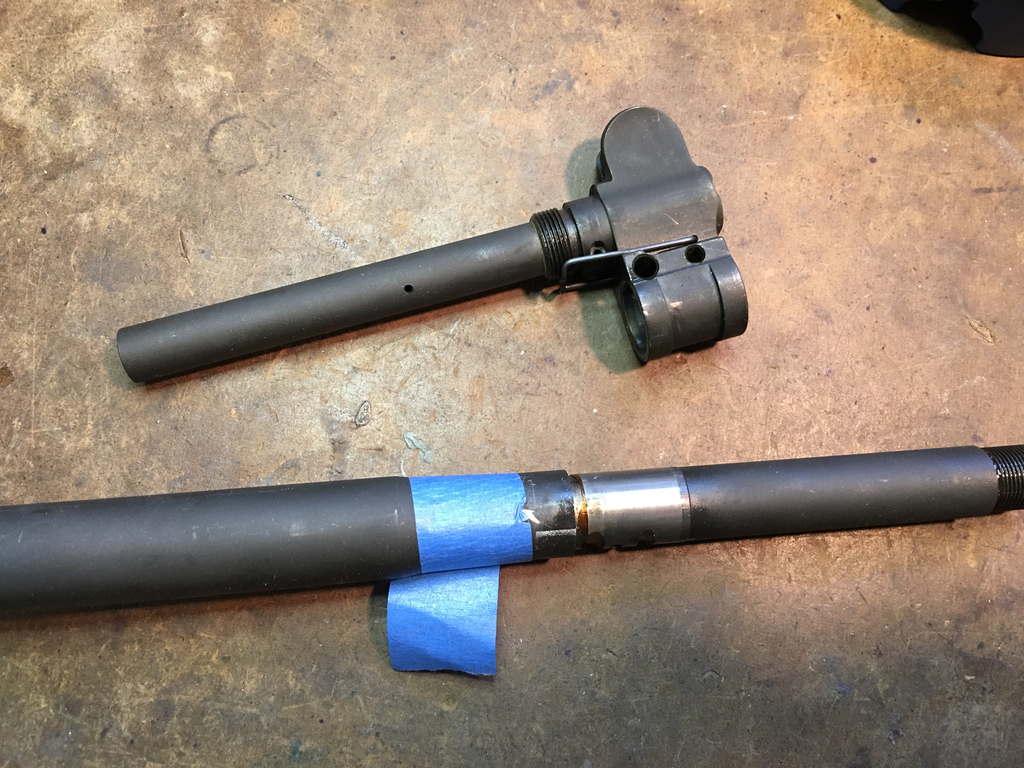
That's Kroil on the barrel. Also scrape marks.
If I had to do this again, I would probably wrap the inside of the collar with tape to protect the barrel finish. It would also help to hold both halves of the collar together while pressing so the collar halves wouldn't try to tip over. Something like a vise or hose clamp would work. Regardless, the barrel was off and the interesting work could begin.
Drilling for the Bushing
The plan for adding a bushing to the gas block involved countersinking the gas block gas port on the inside, where it interfaces with the barrel journal. The bushing would then fit inside this countersink, where it would be held fast with gas pressure and the inevitable carbon fouling.
There may be some machine-shop savants who can countersink a hole in the interior of a tube without drilling through the opposite side of the tube. I am not one of them. Fortunately, the underside of the gas block doesn't do anything important and can survive an extra hole. The best way to locate the hole correctly was to go through the existing holes from the top. I used a Dremel because its chuck was the only thing that cleared the front sight ears when using a drillbit of the proper diameter.
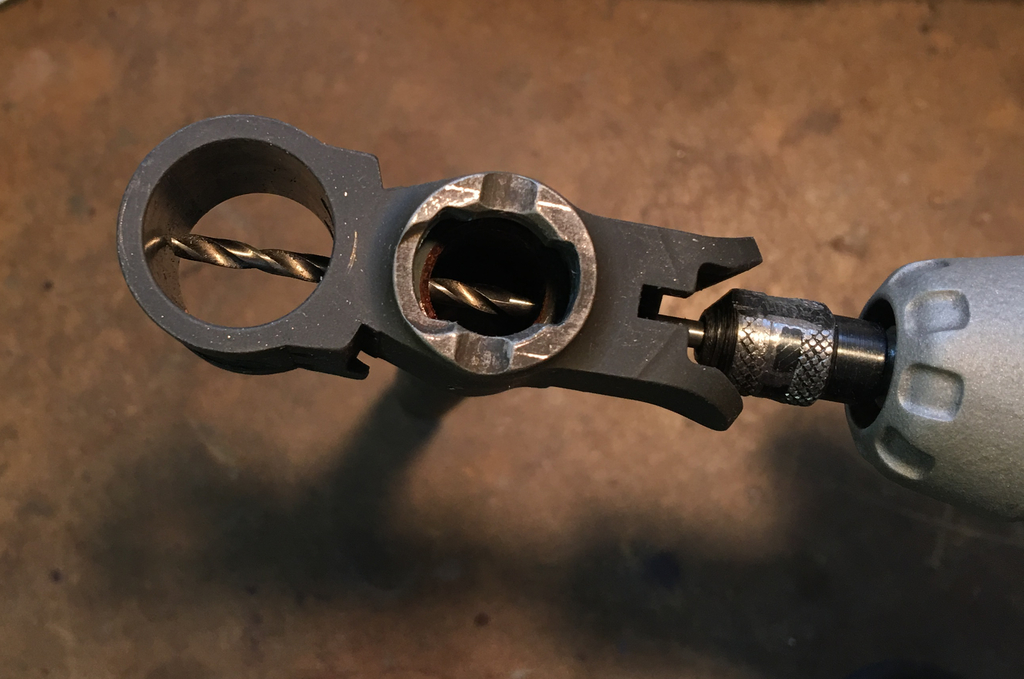
Lends new meaning to "through hole."
Location, location, location...
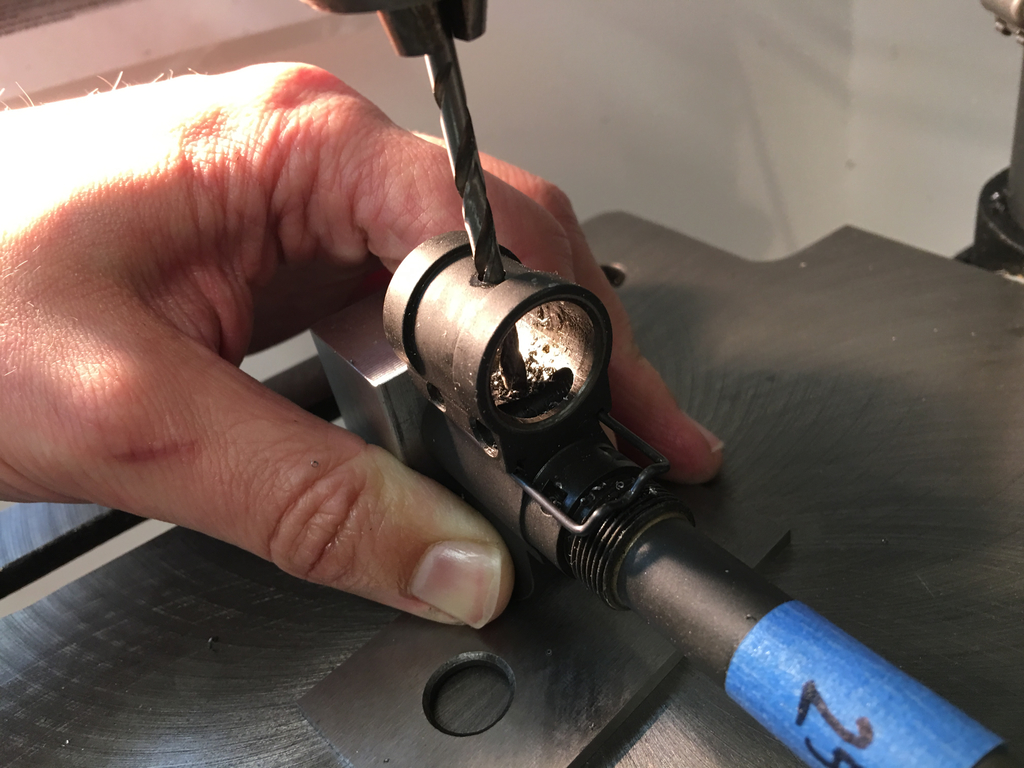
Locating the gas port was only half the battle. In order to countersink the port on the inside, it would be necessary to align the new hole and the gas port for the drillbit. That's a challenging proposition when you consider that the gas block doesn't offer much in the way of reference surfaces relative to the gas port.
Welcome to Rube Goldberg's machine shop.
The rudimentary jig I ended up building uses a chunk of square aluminum scrap with a milled bottom. There's a hole drilled through it that allows a section of threaded rod to pass through the gas block and tube. Tightening the rod presses the face of the gas block against the flat aluminum surface. That still leaves angular orientation, which I addressed by resting the front sight ears on a parallel. Using the front sight ears as a reference surface isn't ideal, since there's no reason the ears should be a dimensionally critical. Compared to trying to freehand things, though, it was acceptable.
There are several superior alternatives to a jig like this, but they all take more work and were therefore out of the question.
- Machine a plug that fits inside the gas block from the front and screws into the aluminum block. Orient the gas block using a drillbit in a mill or drill press, then drill an indexing pin into the aluminum block. Basically a more polished version of what I did.
- Turn a flat-based stand that screws into the front sight post.
- Use a vise to hold the gas block. I would have done this if any of my precision vises were large enough.
Fortunately, the Jerry-rigged approach worked just fine, thereby illustrating one of the principles by which I live: If it's stupid but it works, it's not stupid. (Corollary: If it's stupid and it doesn't work, you're stupid.)
Not yet stupid.
The countersink was successfully countersunk. The only fallout from the process was a cosmetic hole in the bottom of the gas block, and perhaps some tooth grinding damage on the part of any tool and die makers who have been reading this writeup.
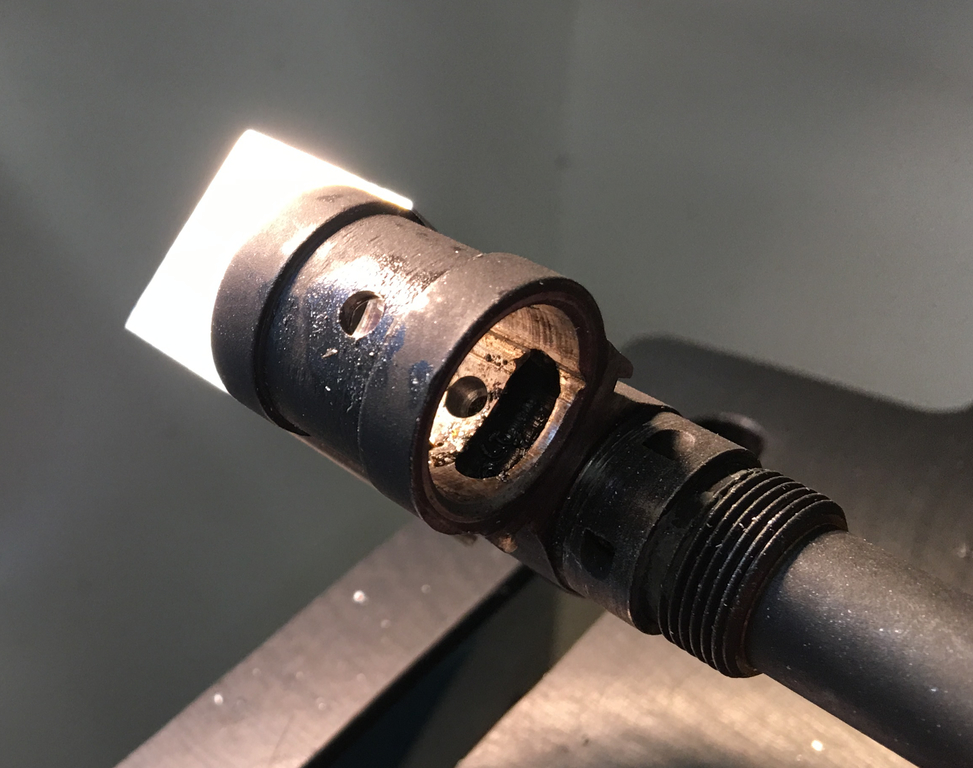
A sinking sensation.
Drilling through the gas block raised some burrs on the inside. Those would wreck havoc on the nicely-machined journal if left in place, but a few light touches with a ball grinder in a Dremel cleaned them up.
Note protective tape. Not that a Dremel has ever gotten away from me before.
Making the Bushing
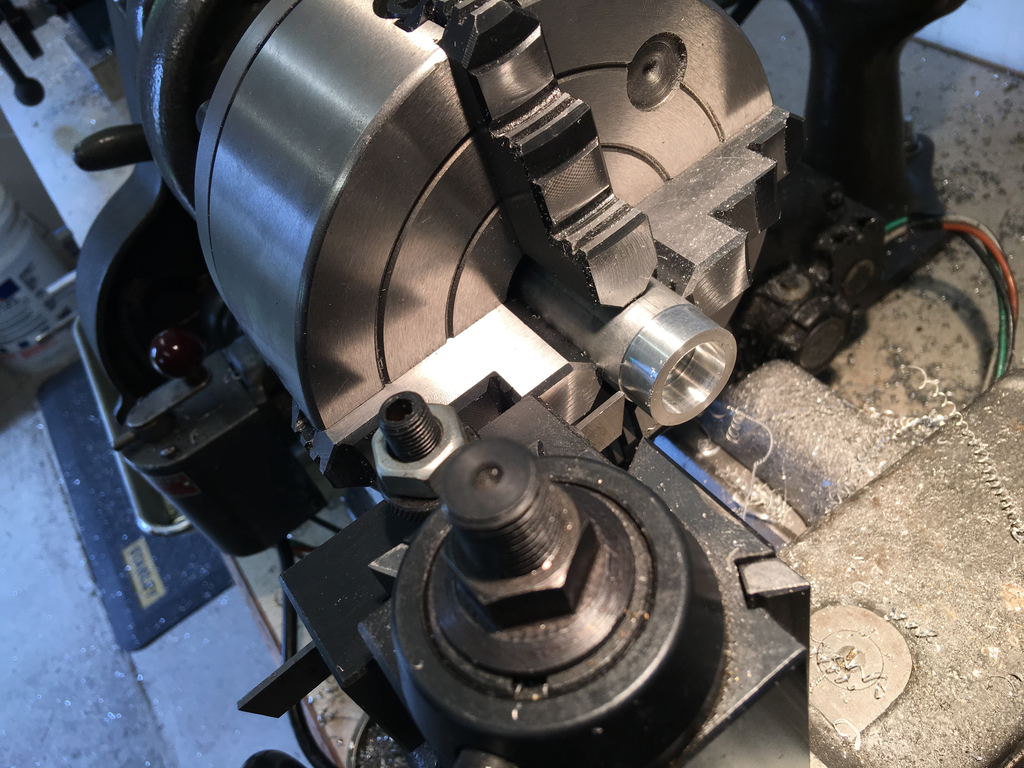
Compared to drilling its countersink, making the bushing was fairly standard stuff. I just needed to cobble together a vise to hold it in the four-jaw chuck, which couldn't close tightly enough to grip the drill rod. The rod is protruding so far in order to leave room between the tool holders and the chuck jaws.
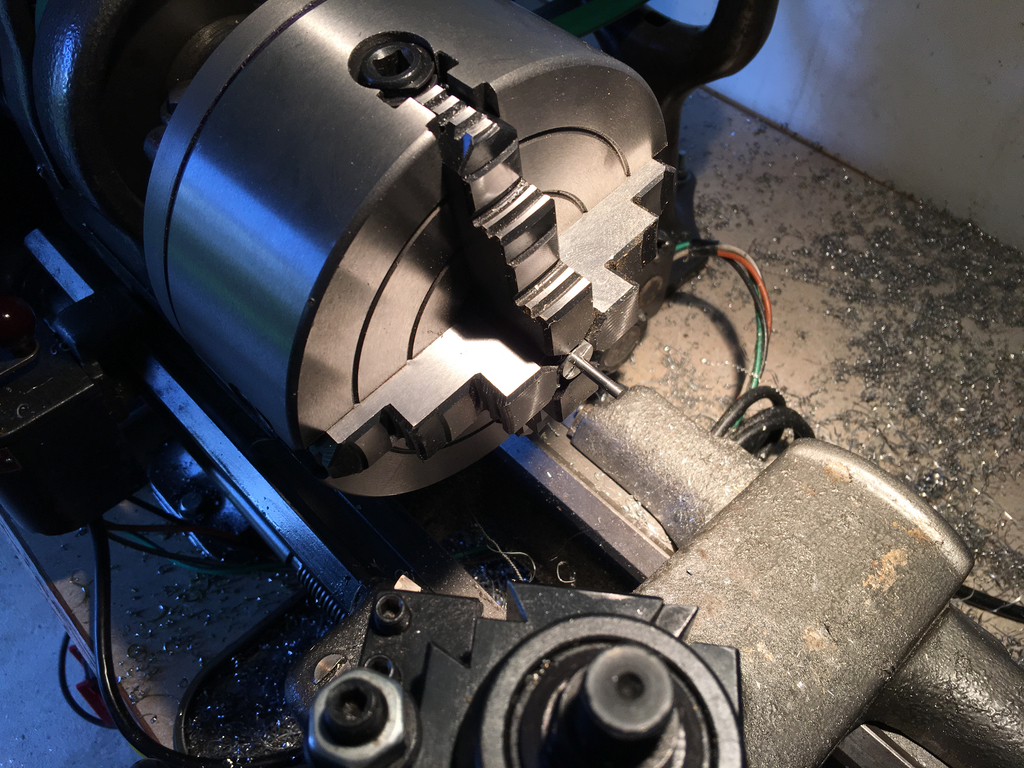
I keep meaning to get a mini-lathe.
Drilling the port was also fairly typical, albeit at hilariously reduced scale compared to the size of work this lathe typically handles. I had to buy a smaller drill chuck just to hold the wire gauge bits required.
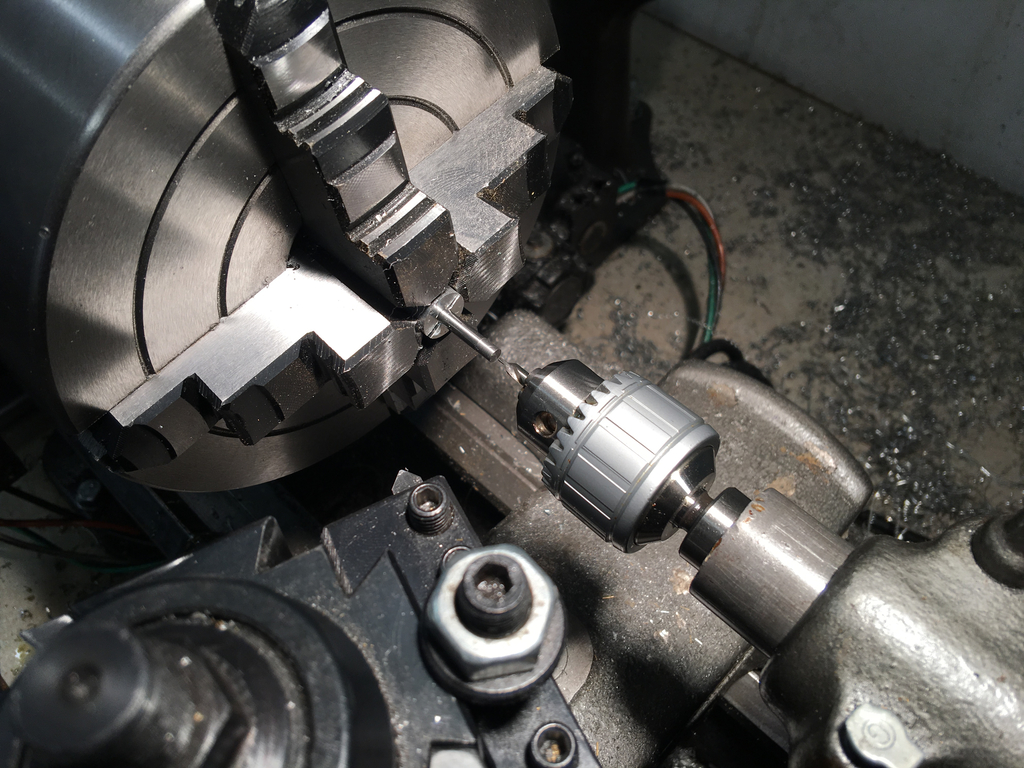
The world's most adorable chuck drilling the world's most adorable gas port.
I didn't even try to part off the tiny rod, but just sawed it off, cleaned up the sawed surface on a belt sander, then went back and made a second bushing after the belt sander grabbed the original bushing and hurled it into a parallel dimension.
A bush in the port is worth two in the hand.
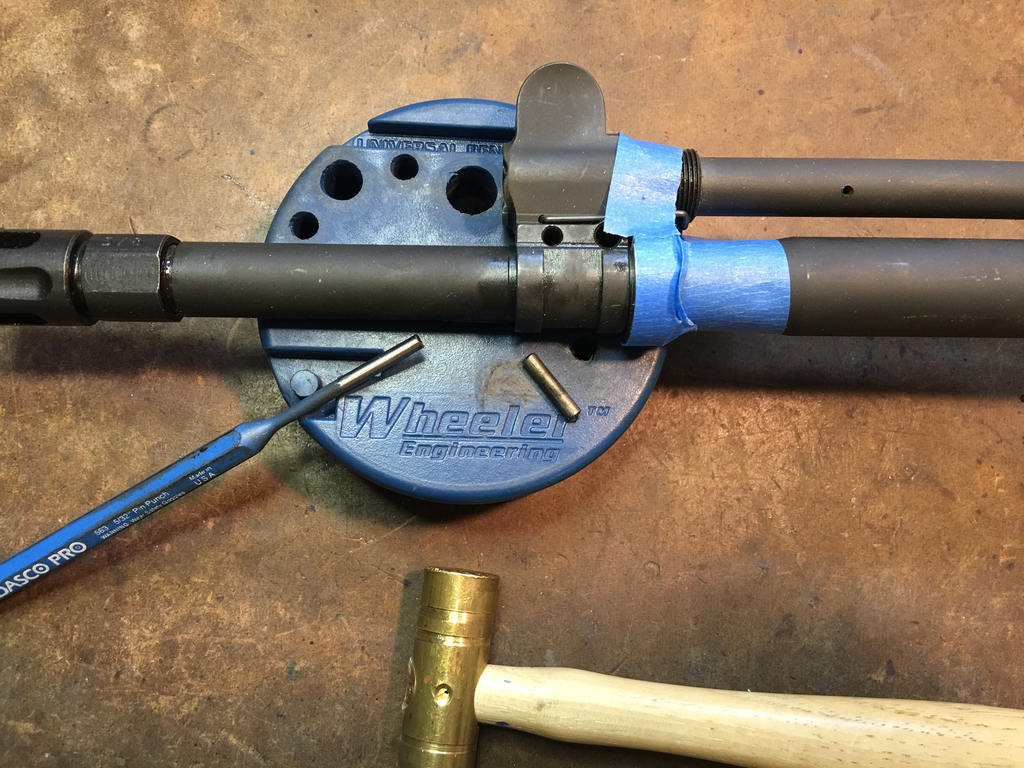
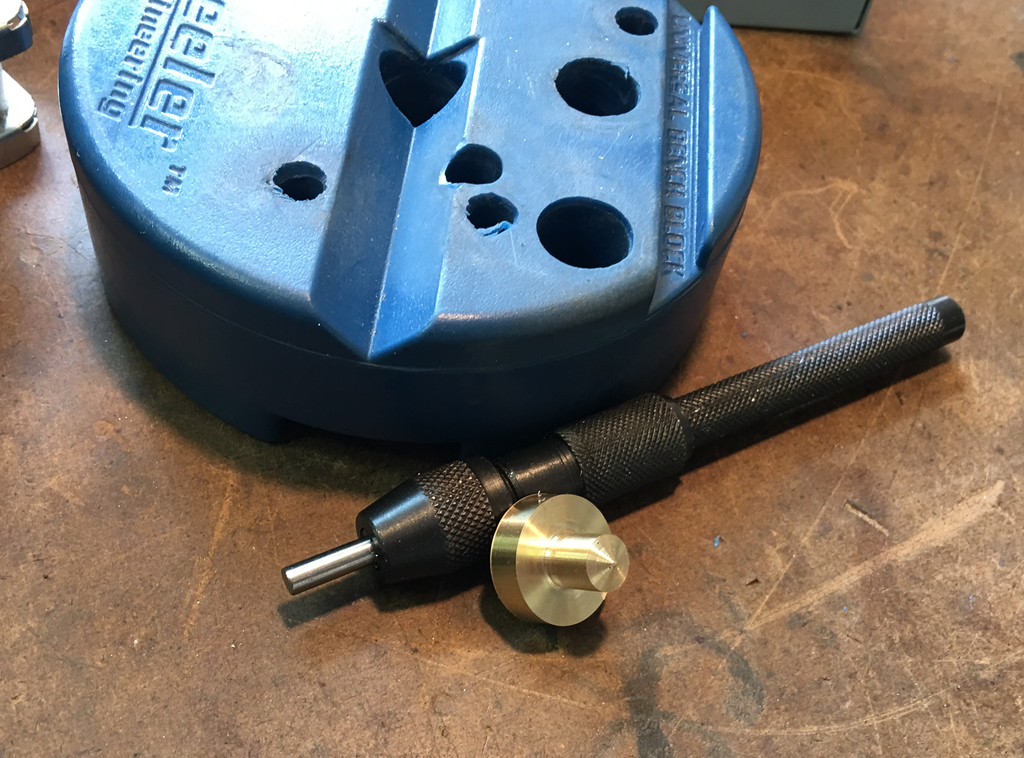
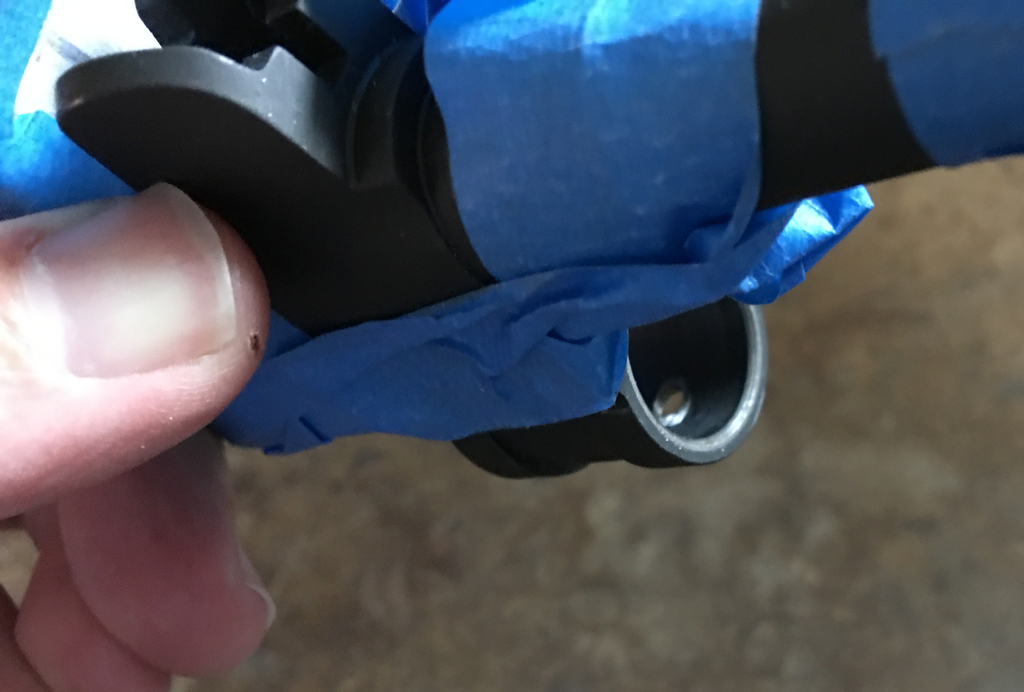
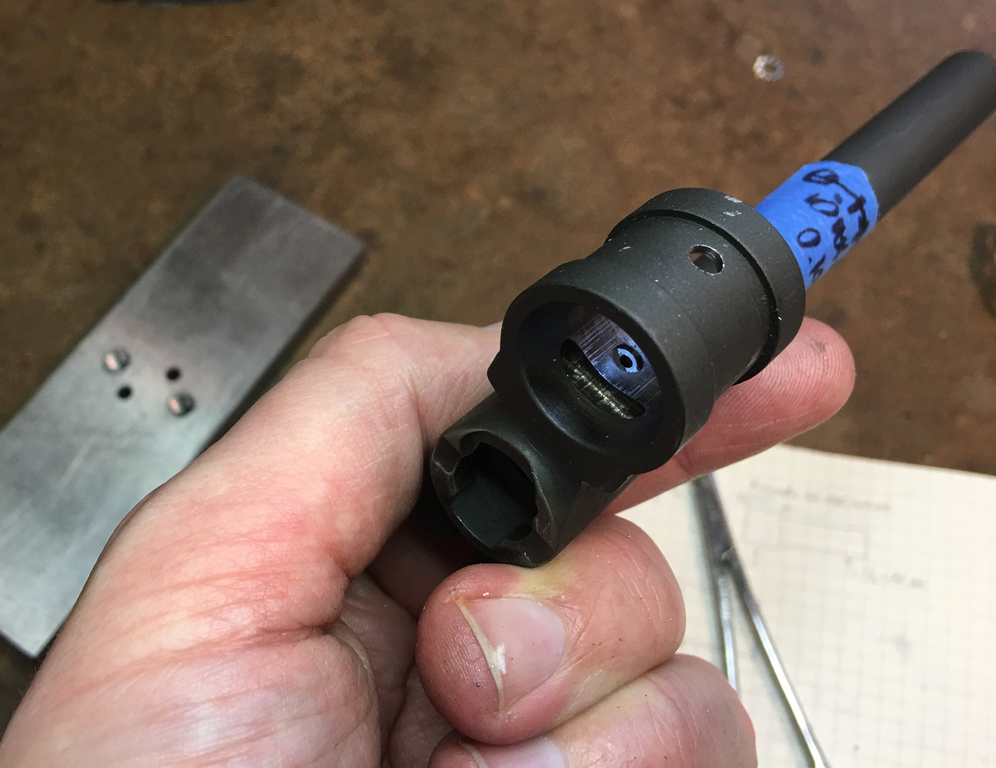
The bushing was just a smidgen oversized, requiring it to be punched into its countersink through a convenient hole in the underside of the gas block. I ended up using a long roll pin punch; the small bump in the middle of the punch, intended to fit into the hollow center of the roll pin, fit into the port in the bushing and kept the punch from trying to walk off.
Speaking of ports, the bushing's port was drilled with a #52 bit, producing a 0.0635 inch hole. I intentionally made it smaller than necessary to permit widening it to the perfect size at the range. I didn't bother hardening the bushing, on the grounds that tool steel's abrasion resistence, even annealed, would be about on par with the 4140 steel from which the barrel is made. We'll see.
Restoring the Gas Block
It's always easier to take things apart than it is to put them back together. The gas block was no exception. Pressing it off was easy because pressure only had to be exerted over a stumpy length of barrel (hooray for SBRs!) and alignment wasn't an issue. Putting the barrel back on required holding the gas block in alignment while simultaneously applying enough force to provide a slip fit.
First up was alignment. Gas block alignment doesn't have to be utterly perfect because driving in the retaining pin should remove tiny amounts of residual tilt. It should be close enough to permit driving the pin in, though. Twisting the gas block around on the journal can damage its fit, so alignment should be close enough from the start.
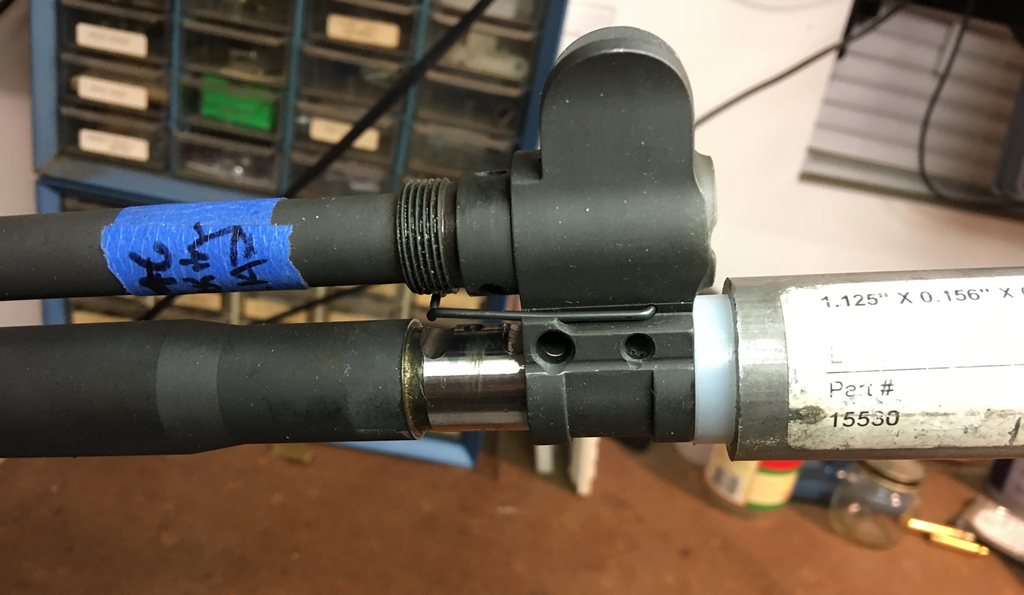
To establish alignment, I used a technique found on The FAL Files. The technique makes use of fishing line tension to indicate points on the barrel journal and gas block in line with the ports. It'll take about 2,000 words to explain:
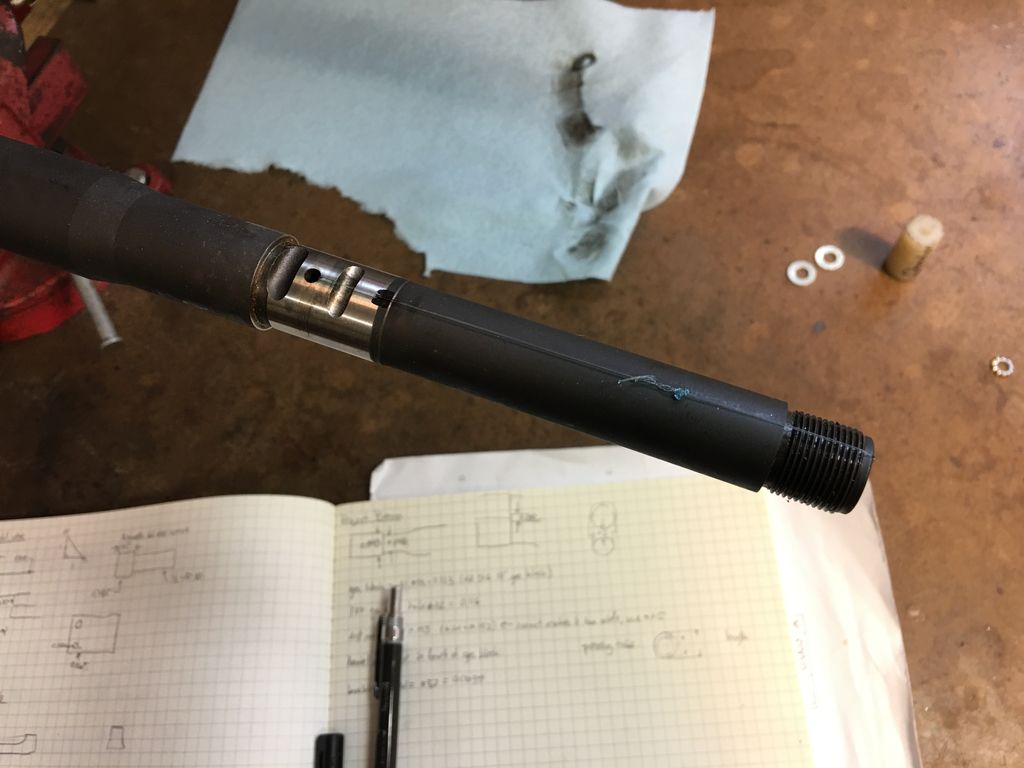
Applying the Sharpie over the fishing line leaves a clean mark indicating the centerline.
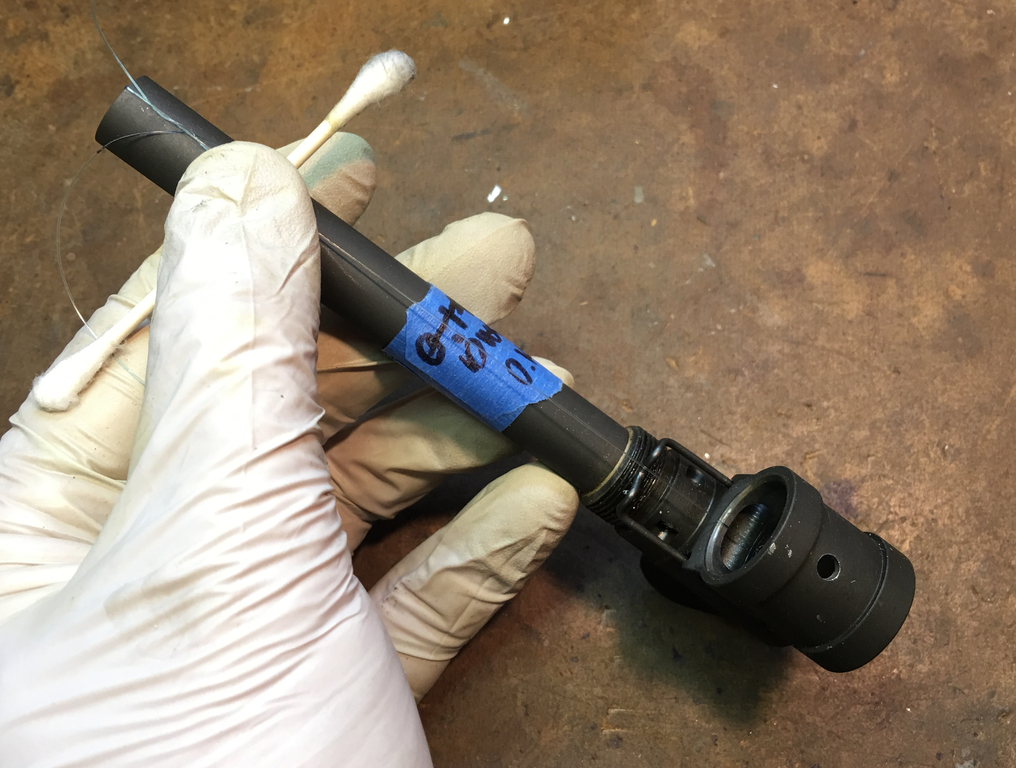
Similar approach for the gas block.
Okay, that was actually 2,020 words. This technique works well and leaves a couple unmarked clear spots which can be visually aligned when starting the gas block onto the journal. The hardest part is threading the fishing line through the gas port, and dealing with the resultant sore throat from one's howls of frustration.
Howls of frustration quickly turn to anxious whimpers when contemplating how to get the gas block back on a barrel while it's attached to the receiver. The thought of pressing against the chamber end of the barrel with a length of steel or aluminum sitting inside the receiver while balancing slightly off-center introduces a certain amount of pucker factor.
Fortunately, there's an easier way to do it if one is willing to fabricate a few parts.
And raid the scrap bin.
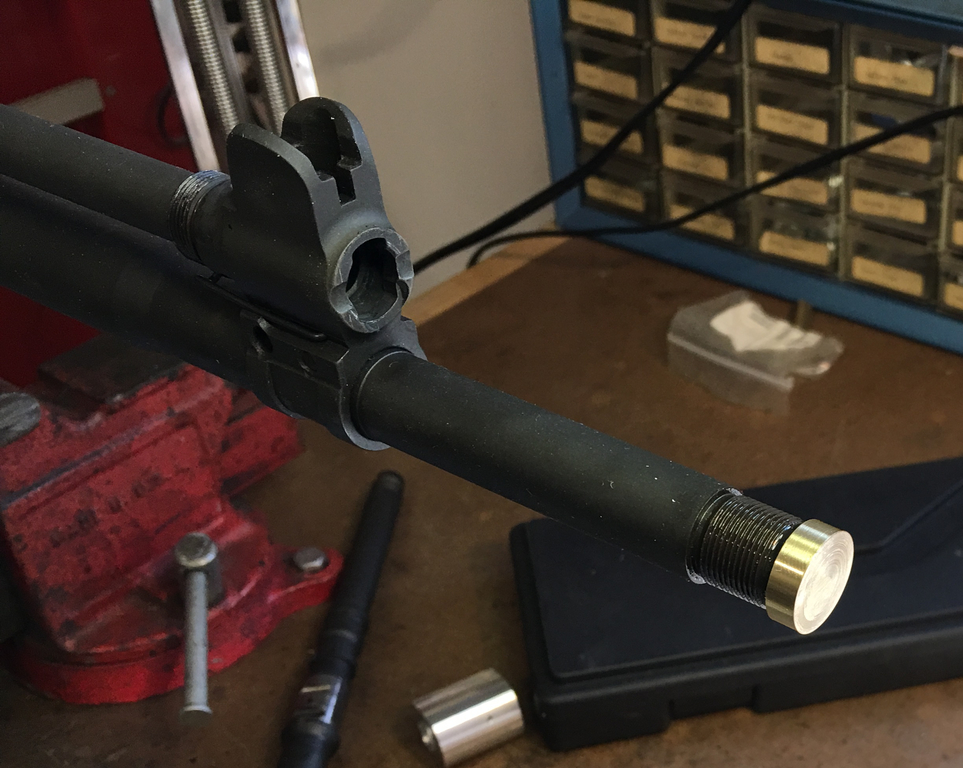
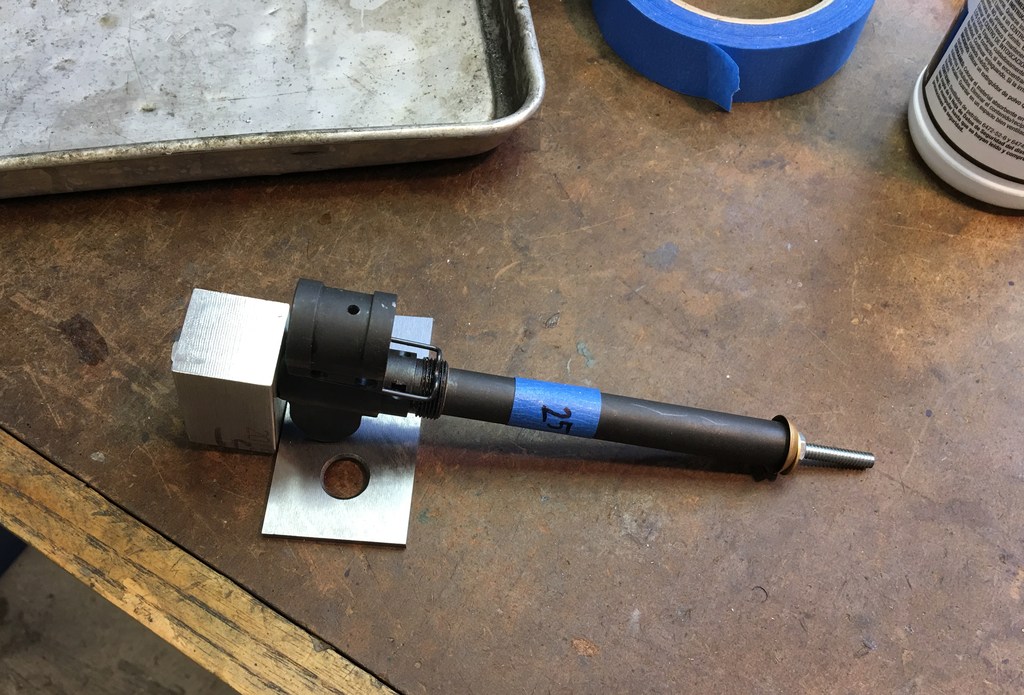
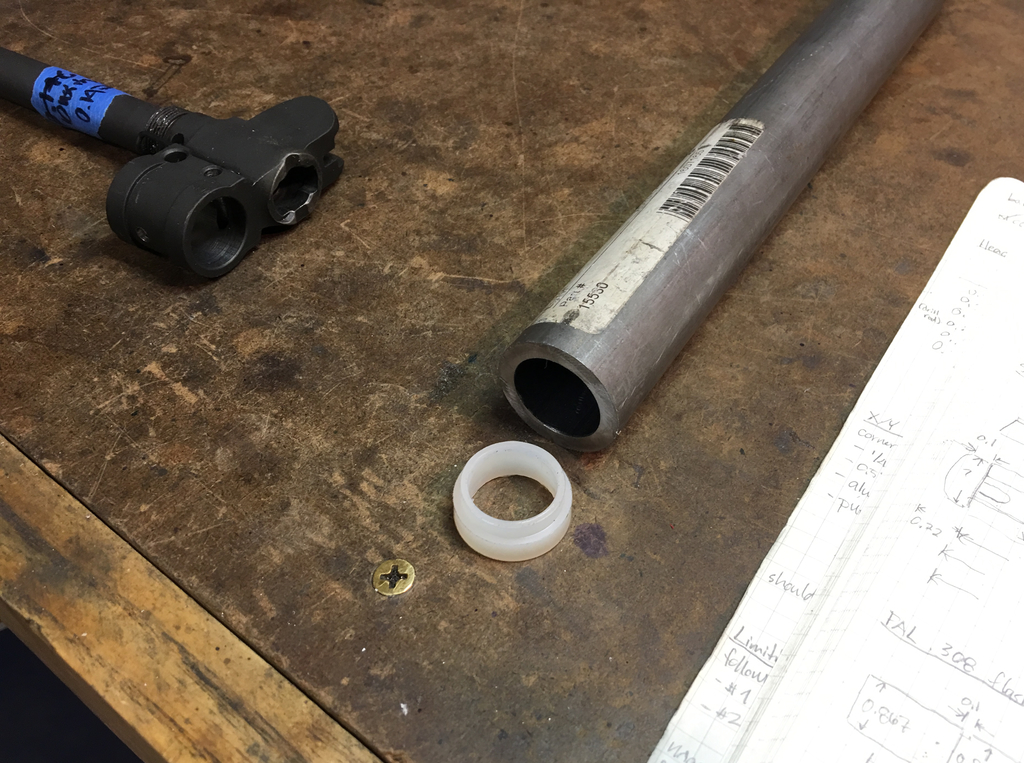
It starts with a nylon collar turned to fit over the barrel and connect a tube to the front of the gas block. (A tube of the correct size could just be used directly, but I didn't have that.) A length of threaded rod goes through the barrel, wrapped in tape to protect the rifling.
There's some nylon at the chamber end, where the rod is secured secured by a coupling nut with a second nut to jam it.

Not your typical jam in the chamber area.
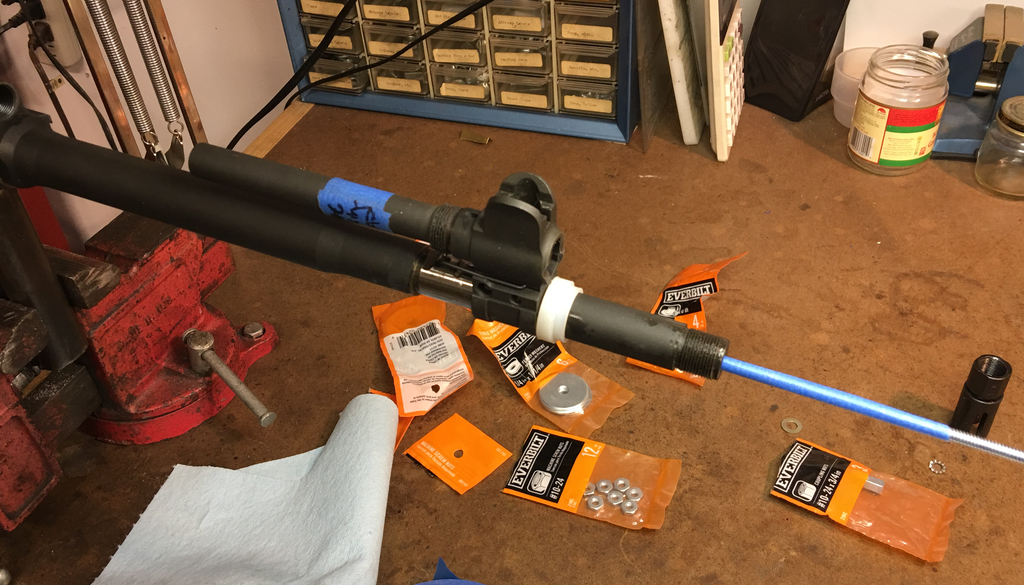
The tube goes over the barrel along with a fender washer and a nut connects the washer, rod, and tube.
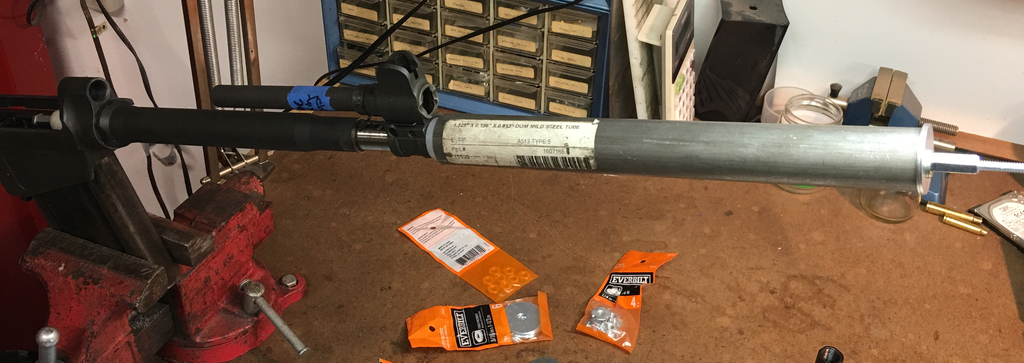
The ATF has yet to rule on whether this is considered a suppressor.
Tightening the nut at the end of the tube moves the nut down the rod, forcing the gas block into place with controlled pressure. There's a distinct lack of FAL receivers being launched out of a hydraulic press and directly into one's gonads.
Not pushing my luck--just the gas block.
This technique works great, although it was necessary to put a wrench on the chamber-end nut to prevent the rod from rotating. Fortunately, SBRs came to the rescue again because it was easy to use one wrench in each hand. The gas block slid smoothly into place, the pin tapped back in, and I smugly surveyed a job well done.
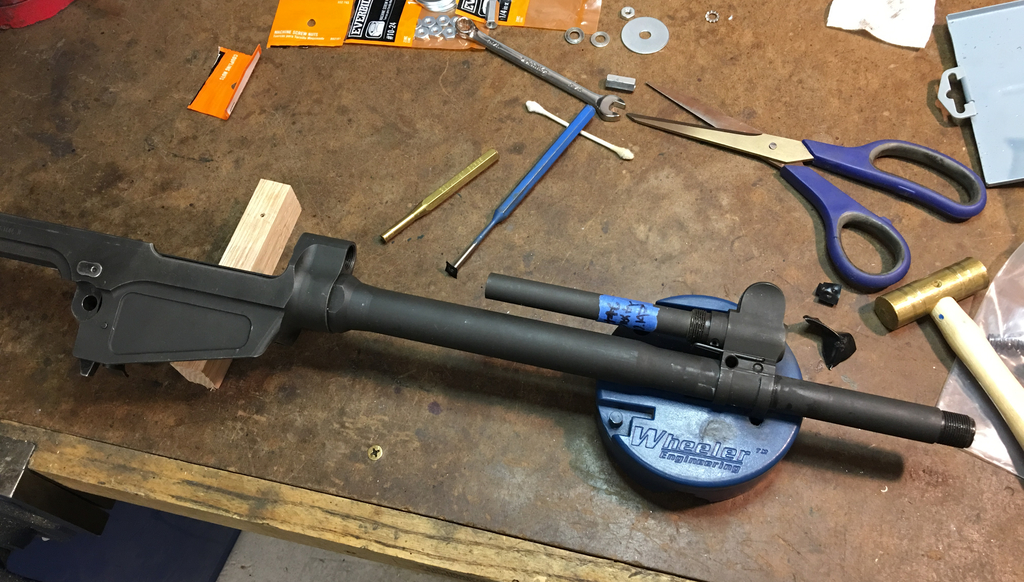
Wait, where's the handguard retainer ring?
That's right: I forgot to put the handguard retainer on the barrel before restoring the gas block. We'll skip subsequent swearing, recriminations, and rebarreling, and move on to a less embarassing phase of the project.
email: hidi.projects@gmail.com