Add Vise
Assembly and Test
Project Beano
A Tale of Two Testfires
More articles
Assembling a Very Tactical FAL
As I've learned from watching C-Span, if you do something stupid or inadvisable, the correct next course of action is to double down as hard as possible. Given that I was making an SBR FAL, why not also make it excessively tactical?
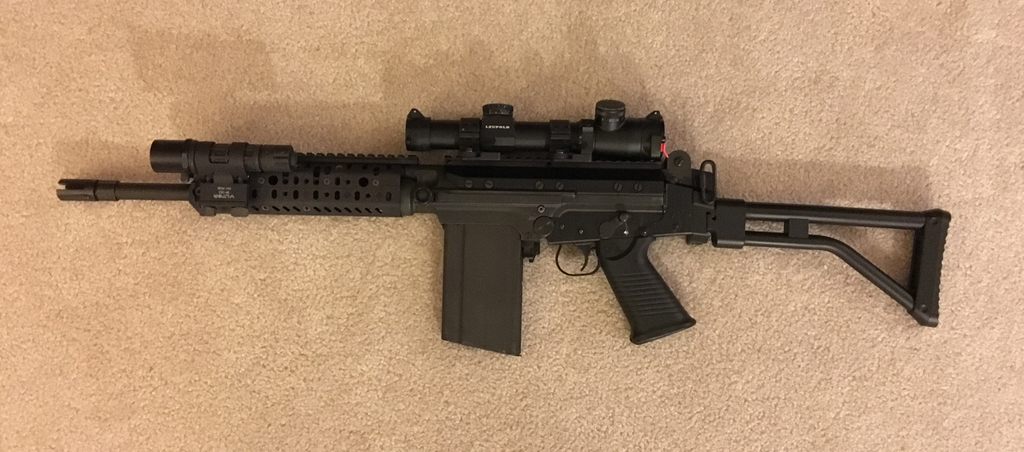
That ought to do it.
I've liked VLTOR rails on FALs ever since handling one at SHOT years back, and now I had the excuse to use them. (Technically, there's still no excuse for what I did, but I'm running with it.) Continuing on in this vein of tacticality, a folding stock is de rigeur, so I used a standard para stock from DSA.
The lower receiver deserves some mention. It's a cast steel Argentine civilian receiver, which was converted to para. I went with steel instead of the lighter aluminum para lower for a couple reasons: First, there was a good chance that the bolt carrier would be slapping around pretty hard, and steel can stand up to such punishment better. Second, I suspected the rifle would feel front-heavy if it combined a light lower and thick barrel. Being front-heavy always seems to make rifles feel heavier than they actually are, so I prefer a heavier but balanced rifle over one that's technically lighter but puts the weight more forward. Should I change my mind at some point, there's an aluminum para lower in the parts box.
Test Fire
As always, when testing something I built, the success criteria are as follows:
- Nothing explodes.
- Nothing breaks.
- Everything actually functions properly.
- The rifle shoots accurately.
With modest expectations thus emplaced, I proceeded to chamber a single round from the magazine and--
And the first round jammed. Repeatedly. Trying to chamber a number of rounds ended in failure each time. There must have been something wrong with the combination of barrel geometry and magazine placement. Gnashing my teeth in disappointment, I returned the magazine to my range bag alongside the other FAL mags that had accompanied it to the range.
Just to be thorough, I tried a different magazine. It worked! The first mag had been one of a batch of rusty and painted mags I bought for $3 each and refinished. One of them apparently had some bad feed lip geometry; comparing it to a known-good magazine showed that the bad mag had visually tighter feed lips. I labeled the bad mag and set it aside. At some point in the future, it might be worthwhile to file the bad magazine until it started working and derive a mag lip width gauge from it. For now, though, I had a rifle to test.
The test produced mixed results. On one hand, the rifle didn't explode or otherwise disassemble itself. It even cycled. Therein lay the problem, though. The first test shots had the gas regulator wide open with the expectations it would need to be tightened down to find correct gas levels. However, even while venting maximum gas, the rifle still cycled violently enough to launch brass nearly 10 yards and bend the rims. If this was the undersized gas port that was requested, I'd hate to see what a standard sized port does.
The Gas Problem
Obviously, the gas situation was unacceptable. If I wanted a rifle that mangled brass before chucking it into low Earth orbit, I'd have just built a G3. Sending the barrel back to DSA for replacement was an option, but that didn't seem like a promising approach; in my experience, someone who is comfortable doing something badly only makes things worse when asked to fix his mistakes.
Besides, I had some ideas...
email: hidi.projects@gmail.com