Casting Recap
Barrel Alignment
Barrel Exterior
But Weight, There's More
Barrel Liner
Completion and Test Fire
Problem 1: Jamming
Problem 2: Sight Alignment
Problem 3: Unscrewing Barrel
Finishing Up
Conclusion
Appendix 1: Optic
More articles
Take another look at the target photo from the last section:
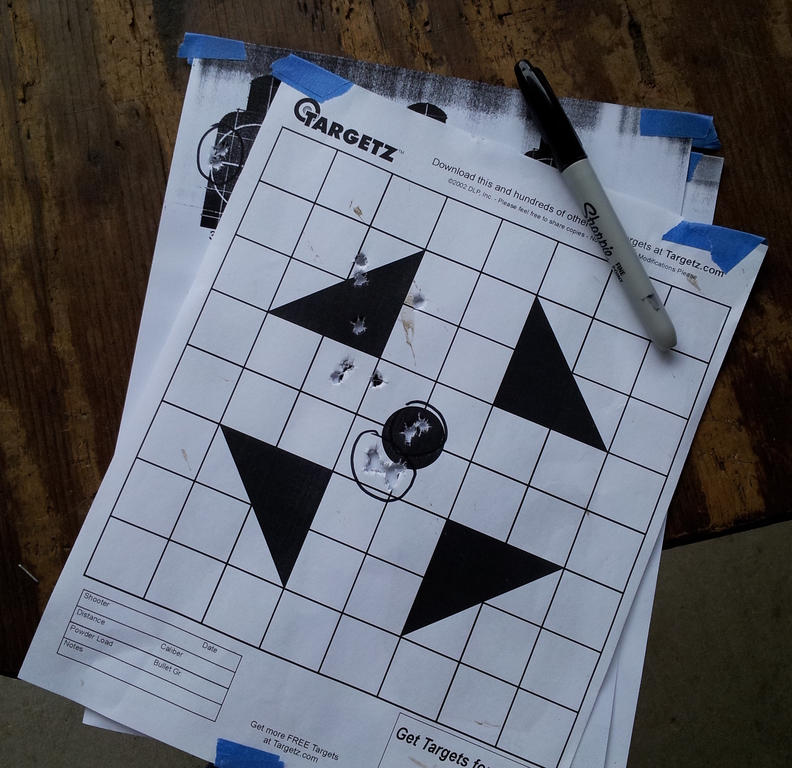
The front target was used to sight in and shows the holes migrating toward zero. The circled groups were each shot without sight adjustmen during the group, although there was some adjustment between them. After shooting the group in the center of the target, I naturally stopped adjusting the sights.
The circled group on the silhouette target was shot toward the end of what had up to that point been an exuberant and victorious session with a successfully-feeding FAL. I'd noticed groups drifting left, which was initially attributed to poor technique or my eye dominance deciding to change eyes. (The downside of being able to change eye dominance at will is that sometimes it happens unintentionally.) Rezeroing the rear sight under the assumption that shooting from field positions was changing my POI helped for a few groups, but eventually groups started migrating again. This continued until the rear sight ran out of windage adjustments.
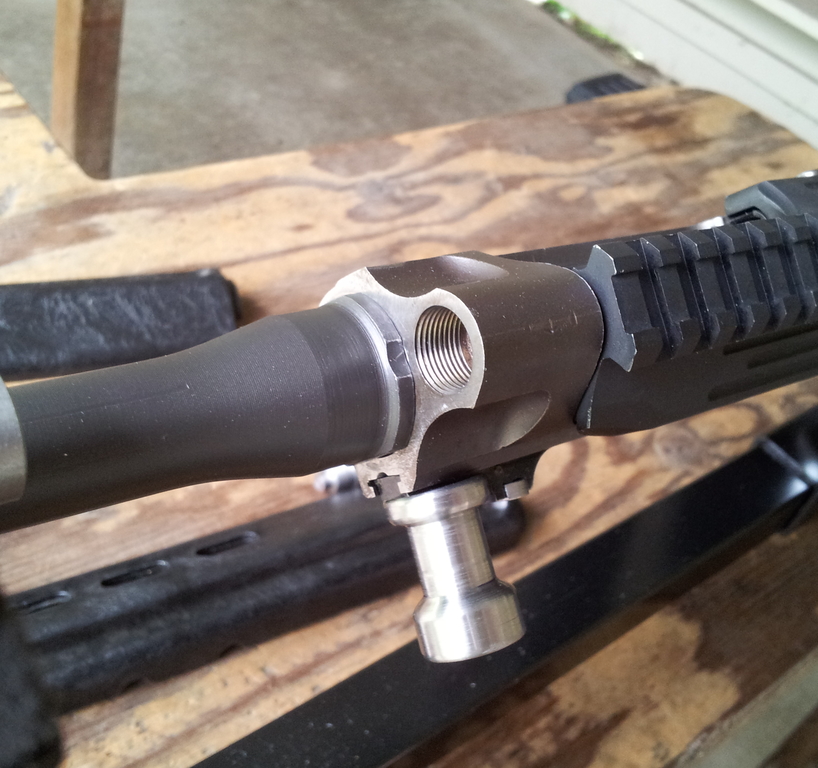
At this point, it was pretty obvious what the problem was. A rear sight that runs out of windage adjustment usually indicates a canted front sight. Looking down the barrel confirmed that the front sight block looked a little off-kilter, and removing the handguards removed all doubt.
Not pictured: doubt.
The barrel was unscrewing under the relentless woodpecker-like tapping of the .22 bolt. Part of the problem was how lightly the barrel had been torqued in the first place, but the other half of it was the amount of contact between the barrel shoulder and the receiver face. The eccentric threaded insert sits below the receiver face surface, leaving relatively little (too little, apparently) of the receiver to interfere with the barrel.
I decided to solve the problem using an approach that had yielded success when applied to overtimed centerfire FALs: hitting it with a hammer. More specifically, peening the edge of the shoulder until desired timing and torque was achieved. Given that only the edge of the shoulder touched the front of the receiver, I had high hopes this would prevent any future unscrewing.
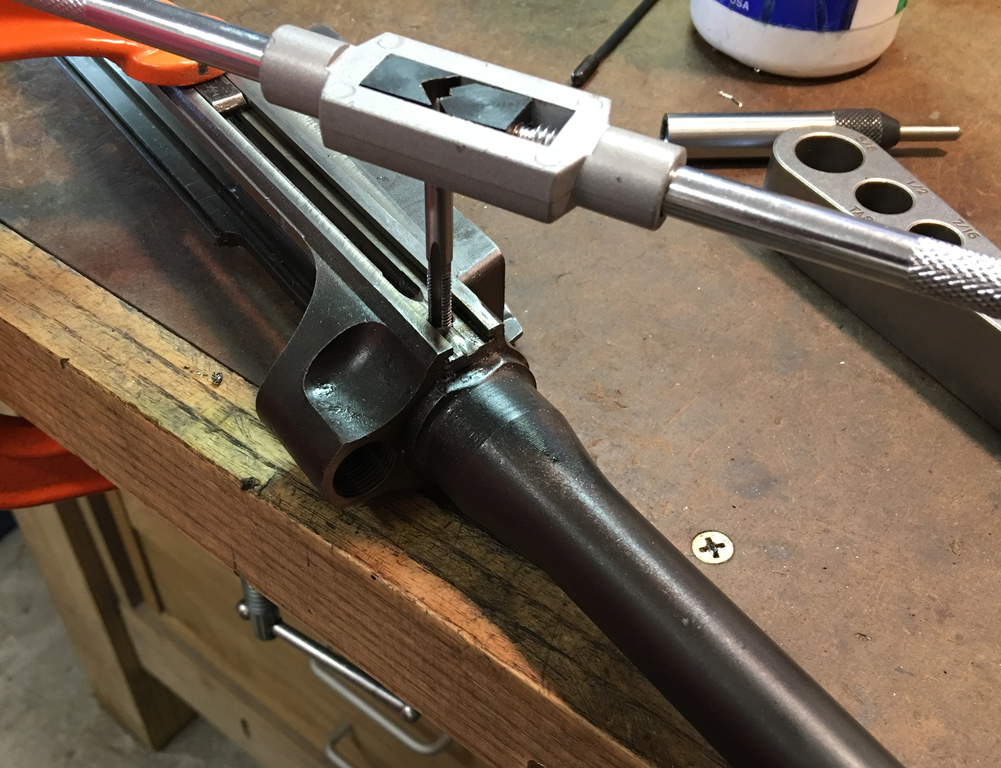
The higher torque resulting from shoulder peening necessitated abandoning the cheesy barrelling setup used previous in favor of my usual setup.
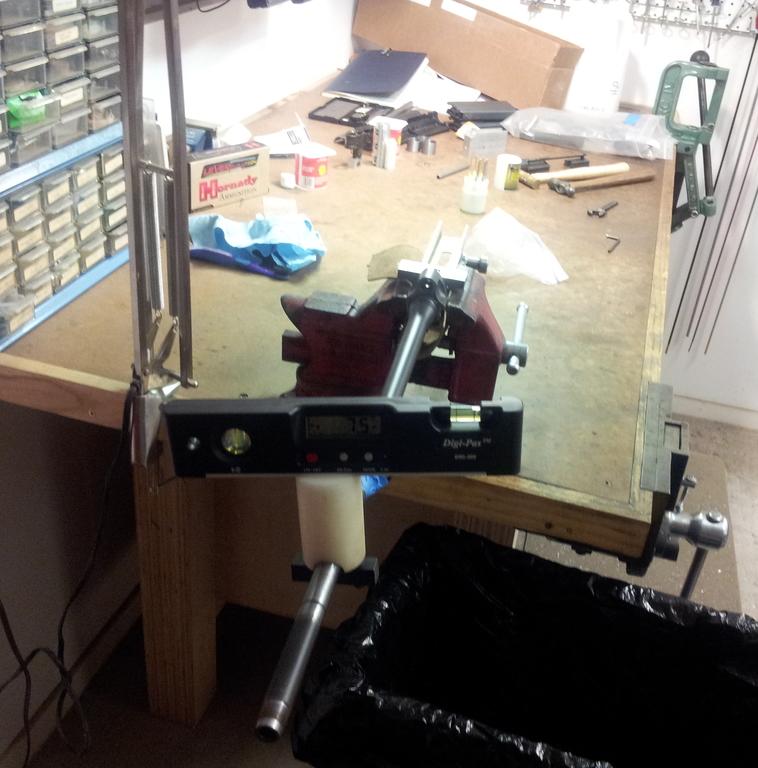
Prior cheesiness.
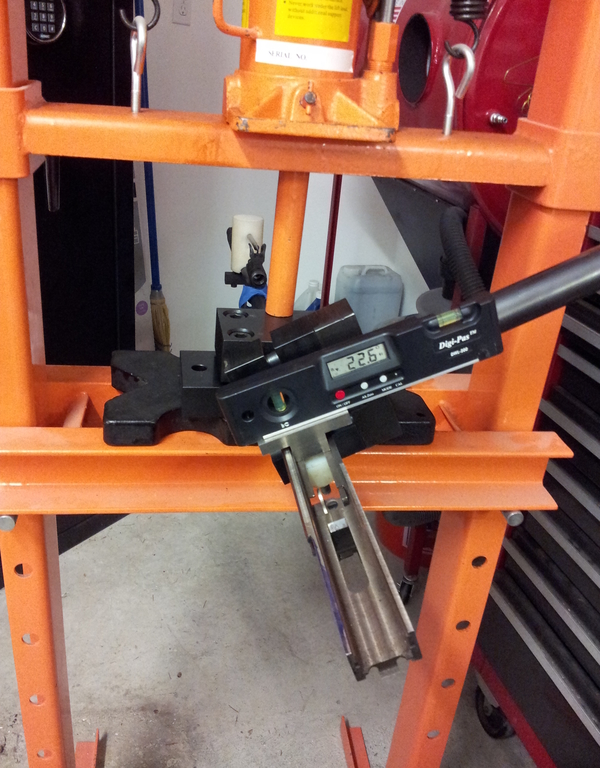
Current non-cheesiness.
The peened and retorqued barrel lasted nearly two whole range trips before it unscrewed itself again.
Fine. Enough torque-related shenanigans. We have ways of making barrels stay put.
No More Screwing Around
The fact that the barrel eccentric was itself ruled out soldering the threads in place, since that would melt the eccentric's solder in the process. Some sort of mechanical lock between the barrel and receiver was required: a pin or screw connecting the two.
An inability to use solder was actually a blessing in disguise because it forced me to implement a solution that solved two problems at once. FAL charging handles have a pin detent engages a small recess in the receiver. I'd drilled that recess-center and so the charging handle didn't lock forward very; bumping it with one's thumb while maintaining a magwell grip could dislodge it. If I had to pin or screw the barrel in place, why not drill through the mislocated charging handle detent recess and replace it with a set screw? The charging handle detent would lock into the recessed head of the set screw, fixing charging handle lockup. As a side benefit, the set screw would be hidden under the charging handle during normal operation.
Prior to installing the set screw, I torqued the barrel on yet again. No photos, since this was just business as usual. The only thing worth noting was the unusual amount of care taken to ensure the timing was perfect. Once the set screw was installed, the barrel timing would be set, so it better not be screwed.
The original detent recess made drilling difficult, so I just chucked up a carbide burr in the drill press, cranked up the RPMs to ludicrous values, and walked in a starting recess by eye. Fortunately, the charging handle detent had worn a small groove into the receiver, making it obvious where the new hole had to go.

Burr: It's cold in here.
The new recess was just to ensure the drill lined up correctly and was obliterated in short order by drilling through the receiver, through the barrel, and all the way into the chamber. I had to ignore years of gun-instincts screaming about how I was ruining the gun by remembering that the chamber insert did all the pressure containment. Fortunately, some distraction was provided by noticing the increasing force required to drill as the bit passed from soft receiver to 8620 eccentric, to hardened barrel.

Not recommended for a real FAL.
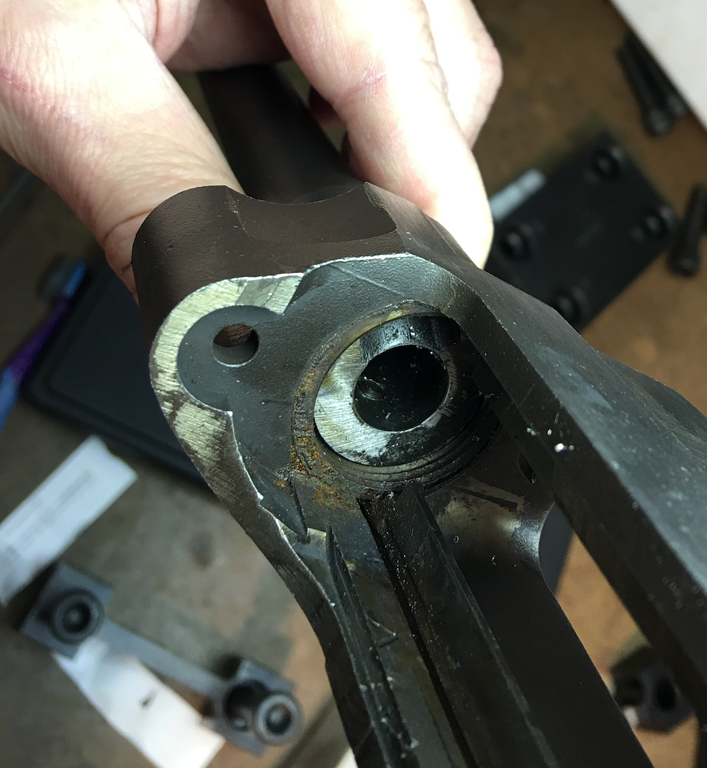
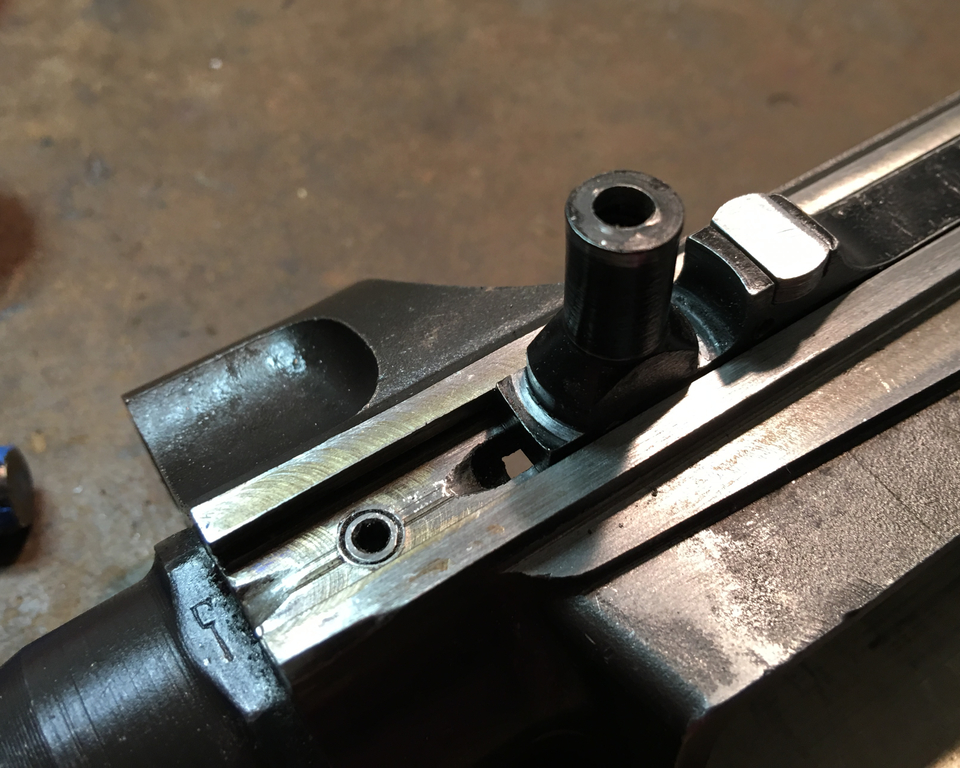
After enlarging the hole by step-drilling, I tapped it for the set screw. Note the tap guide in the hole below; no way I was doing this freehand.
The threads in the hole through receiver and barrel were not threaded all the way because I didn't want the set screw tightening up and interfering with the chamber insert. I stopped tapping when the end of the screw just barely protruded into the chamber.
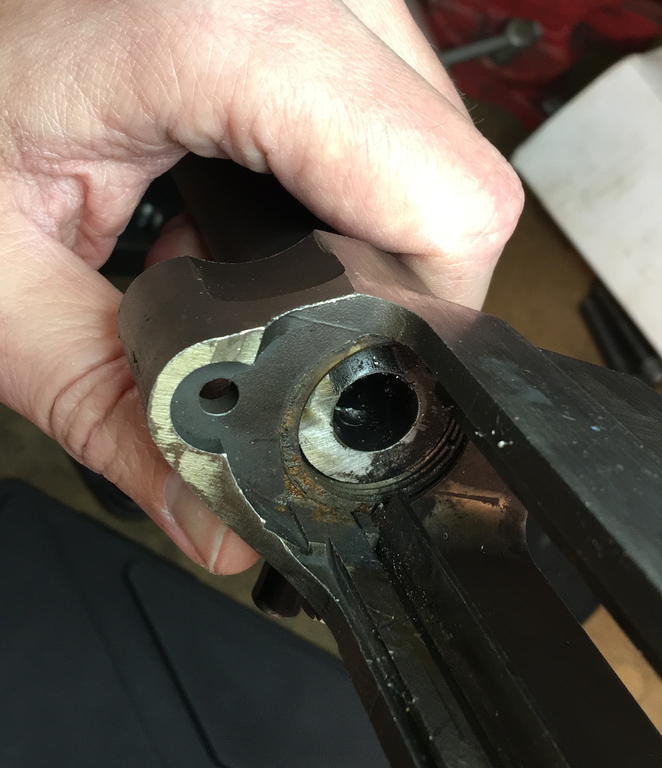
A few seconds on the belt sander took the end of the screw below flush with the chamber wall to prevent binding on the chamber insert.
On the outside of the receiver, the set screw's socket sat slightly proud of the charging handle track.
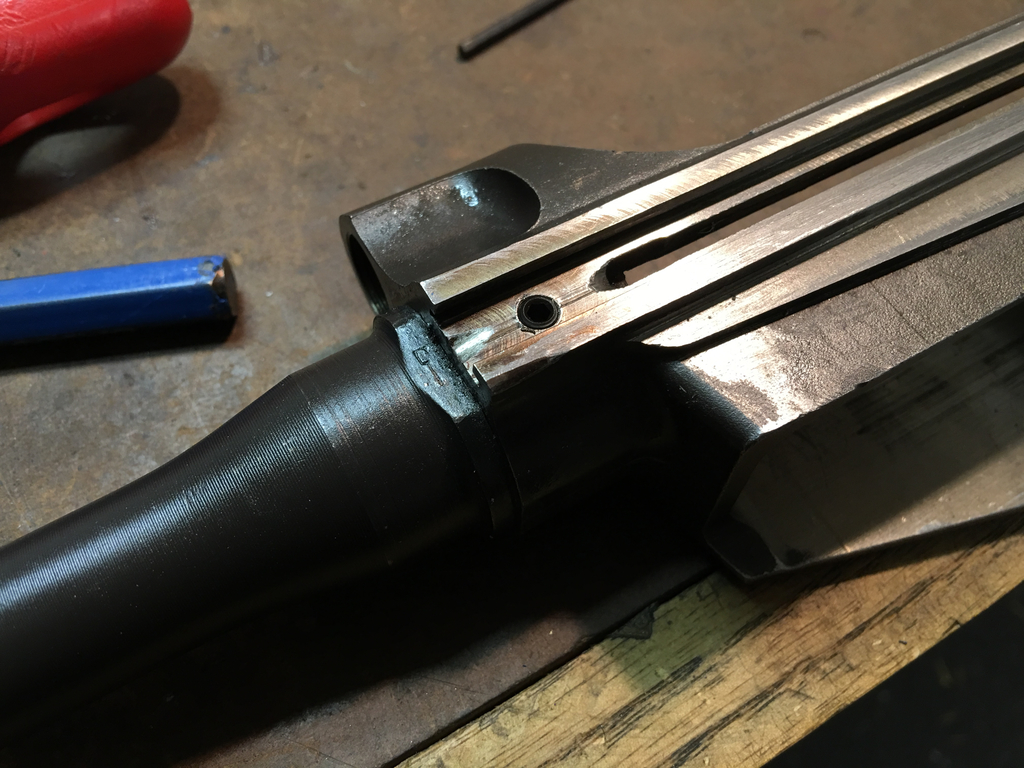
A few strokes with a file humbled it.
Provided the barrel didn't try to unscrew itself hard enough to snap steel, it wasn't going anywhere. Even better, the charging handle now locked into place with satisfying positivity. Best of all, evidence of this particular screw-up (unscrew-up?) was invisible when the charging handle was forward. (There were plenty of other mistakes visible, but at leat not this one.)
The set screw solution meant the rifle was now committed to its current barrel timing, but also addressed the final functional problem. At this point, it finally felt safe to apply the last touches needed to call the build done.
email: hidi.projects at gmail.com