A Million Little Pieces
I've Been Framed
Guts and Glory
Pins and Needle Files
My Luggy Day
Searious Issues
Sliding Into Position
All Together Now
Spacing Out
Wear to Go from Here
Barreling Ahead
Breech of the Piece
Starting Out with a Bang
Round Two (hundred)
The Kart of Barrel Fitting
Fed Up
Safety is a Snap
Dispatches from the Front
Pulling Through
The Final Part
Lessons Learned
Frequently Asked Questions
Errata and Clarifications
More articles
Round Two (hundred)
I returned to the range with the mildly-tweaked 1911 to see if my work had effected a noticeable change. I'll spare you any suspense and just say that no, it didn't make any difference. Failures to feed and forward extraction were still in evidence.
However, the way that something fails often provides more information about how it works than proper operation reveals. In this case, I was able to confirm that forward ejection came about due to retarded slide movement to the rear. Assisting in this diagnosis was a box of 200-grain lead semi-wadcutter cartridges over a light load of gunpowder. These would impart less momentum to the slide when fired, so if the slide was hanging up during recoil, they should eject to the front more than full-power 230-grain ball ammo. My hypothesis was confirmed, as almost every single wadcutter round ejected to the front, while the ball ammo was more hit-or-miss. Something was still grabbing the slide on its way back.
Additionally, this second round of testing revealed even more failures to feed. Widening the breech face hadn't fixed those issues, so it was clearly something else entirely. I turned to the M1911.org forums to ask what could be causing the feeding issues. One of the photos I attached to this question was the image of the barrel ramp below.
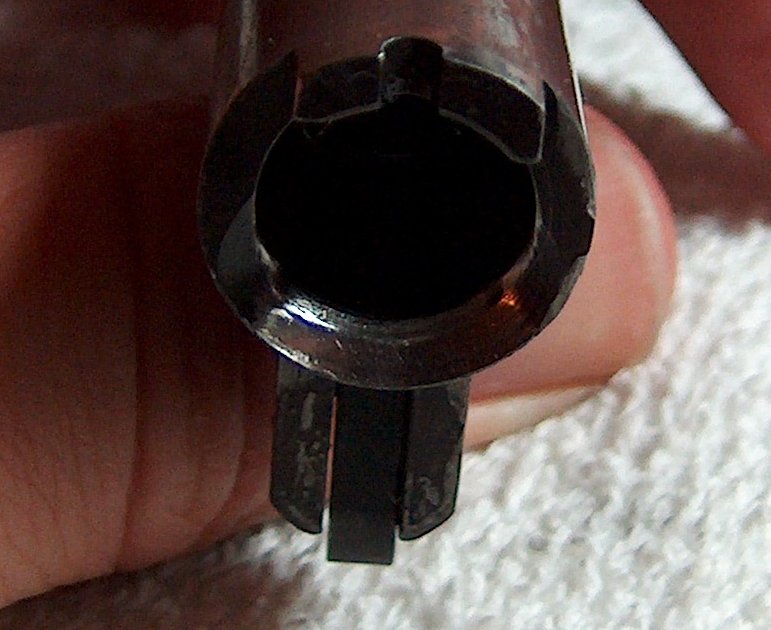
What could possibly go wrong?
I posted the above photograph in the gunsmithing section of the forums, and within moments 1911 experts around the world spat coffee onto their keyboards, which they then used to type invective-laden posts, the gist of which inevitably boiled down to, "what the #$@*& did you do to your barrel ramp?"
It seems that the "gunsmith" I hired to ream the barrel's chamber decided to do me a "favor" and hogged out the barrel ramp at the same time in the interests of making feeding more reliable. Unfortunately, it doesn't quite work that way, as his efforts only created a sharp edge that caught the ogive of the bullet during feeding and compromised case web support for anything that actually managed to make it into the chamber.
1911Tuner generously offered to fix up the barrel if I wanted to ship it to him, but I declined on the grounds that it would be throwing good effort after bad. This barrel wasn't that great to start with and had a void near the front of the chamber already, so throwing more time into it, especially someone else's time, would be a waste. Better to just spend the money on a high-quality barrel and fit it to the gun, like I should have done from the start. By this point I had well over $100 dumped into cheap barrels, none of which worked. It's true what they say: Buy cheap, buy twice.
The barrel was a dismal failure, but maybe I could achieve some success with the extraction issue by removing any impedence to the slide's rearward motion. Lapping the slide to the frame was an obvious choice, but unlike most obvious fixes is the right thing to do. The motion of the slide against the frame had smoothed out some with the first shooting session, but some lapping made it downright silky.
Not content to rest on my laurels (they get wrinkled when I rest on 'em), I looked for other areas of possible rearward friction. Another obvious one was the disconnector. The disconnector that came with my parts kit was a little on the long side, but that's better than being too short. However, to eliminiate the possibility of slowing the slide down, I knocked down the high spots and did some very tentative polishing of its face, being careful to remove no metal from its tip.
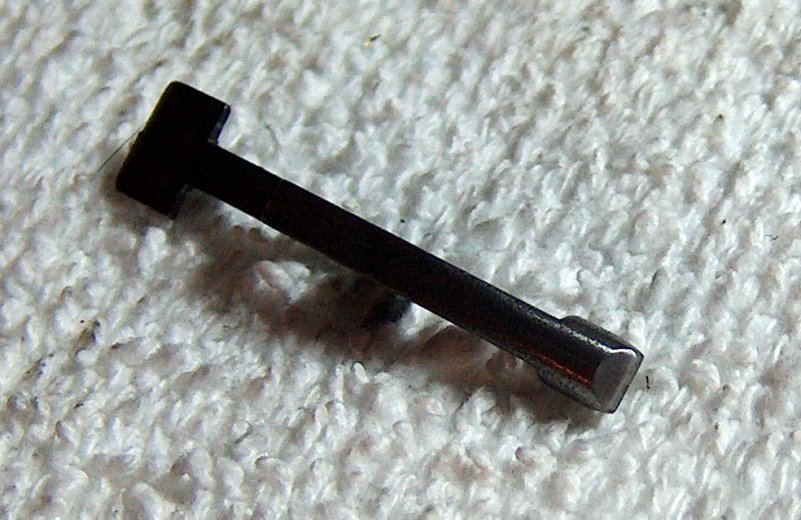
Disconnector front.
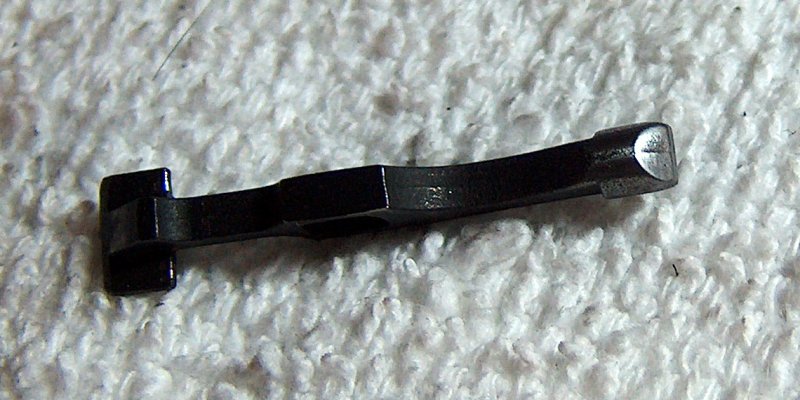
Disconnector rear.
Notice that I didn't remove any metal, but just knocked down the high spots that might be causing friction. I did the same for the disconnector tunnel, exercising caution that the tunnel opening was not enlarged.
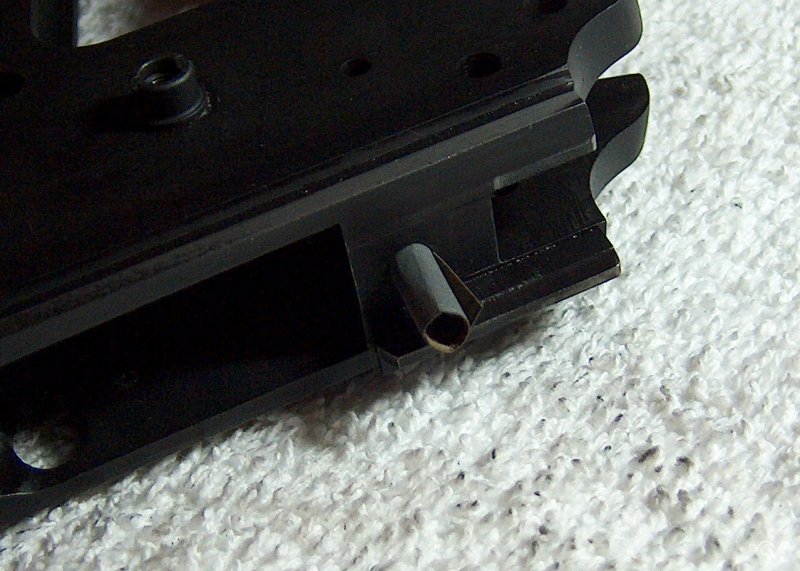
Change the channel.
Since I was tweaking things, I decided to fix the hammer strut pin, which had a bad habit of walking out. It hadn't bound up the action yet, but a new hammer strut pin costs a dollar at most and removes any chance of this occurrance. Given the amount of force required to tap it into position, the possibility of it walking out is laughable.
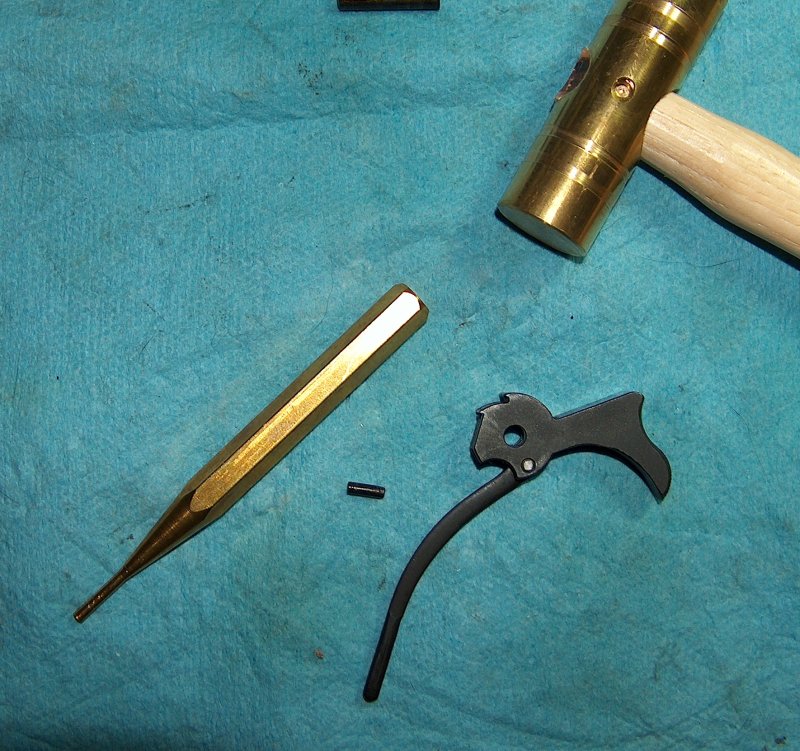
New hammer strut pin after gentle insertion.
Then there was the issue of grips. Thus far, I'd been using the plastic USGI surplus grips that came with the parts kit. Those worked well enough, but I wanted real wood grips, preferably walnut. These were intended more for feel than looks, as the appearance of this 1911 I was building was almost certain to win few beauty contests. Wood grips feel warmer than plastic and tend to absorb sweat instead of becoming slippery. All that being said, wood grips look awfully nice to me no matter what kind of gun they're on. I was able to find some inexpensive wood grips online featuring GI A1-style checkering. One of the nice things about the 1911 is that its grips require little inletting and are simple to make, so wood grips don't cost an arm and a leg like they do for some handguns, such as S&W revolvers and Browning Hi-Powers.
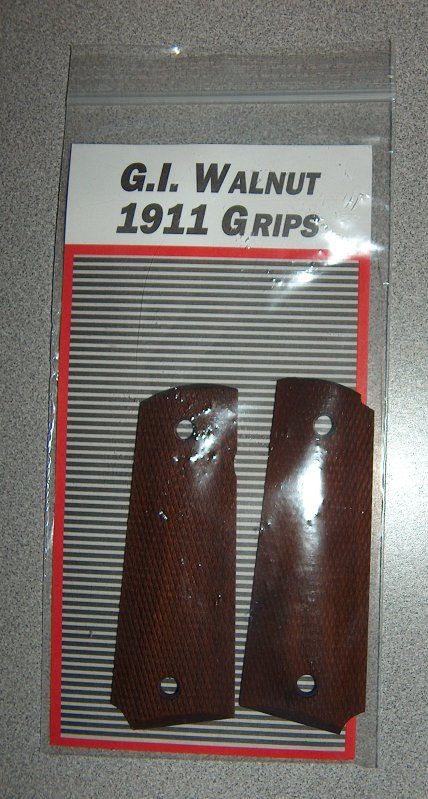
The only cheap parts that worked perfectly.
Finally, I scored a victory for both aesthetics and ergonomics with the purchase of a short, ridged trigger at a gunshow. Although I fished the part out of a bargain bin and paid a scant $3 for it, it fit and functioned pefectly.
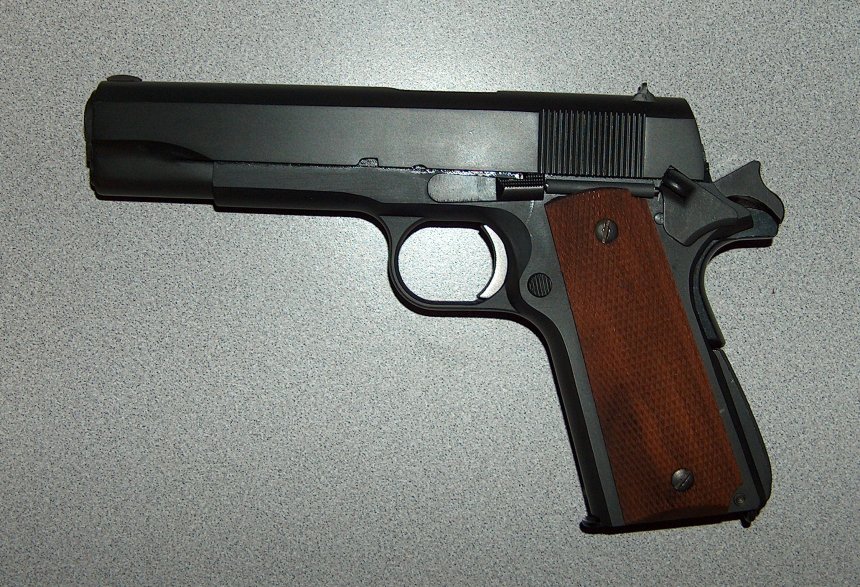
New look and feel.
These minor upgrades provided minor improvements in ergonomics, but the big issue was still the feeding problems caused by bad work on a bad barrel. Given that I intended to take a brief hiatus from all things barrel-related until my aggravation returned to manageable levels, what did that leave for me to do?
As it turned out, plenty.
email: hidi.projects at gmail.com