A Million Little Pieces
I've Been Framed
Guts and Glory
Pins and Needle Files
My Luggy Day
Searious Issues
Sliding Into Position
All Together Now
Spacing Out
Wear to Go from Here
Barreling Ahead
Breech of the Piece
Starting Out with a Bang
Round Two (hundred)
The Kart of Barrel Fitting
Fed Up
Safety is a Snap
Dispatches from the Front
Pulling Through
The Final Part
Lessons Learned
Frequently Asked Questions
Errata and Clarifications
More articles
The Kart of Barrel Fitting
My earlier misadventures with 1911 barrels had unpleasantly and pointedly demonstrated the value of good parts. I was therefore determined to leave all lesser-quality components behind and settle for nothing less than a top-shelf hand-fitted barrel. Bar-Sto was a bit dear for my taste, and would have been out of place given the generally mediocre quality of the rest of the gun. Additionally, I didn't want to tackle a hard-fit barrel at this point, seeing as this entire gun project had me in over my head; when you dive into the deep end to learn how to swim, it behooves one not to do so while holding onto a cinderblock. Thus, I decided to go with a Kart EZ-Fit barrel.
Going from a cheap Roto drop-in to a Kart hand-fit barrel is like going from hot dogs to sashimi: It's a massive jump in quality, but the unrefined palate will find the more sophisticated of the two strange and a bit frightening. However, I took faith in the fact that the barrel was, per its name, "EZ" to fit. How hard could it be?
We will now pause while those who have fitted 1911 barrels laugh until they drool on themselves.
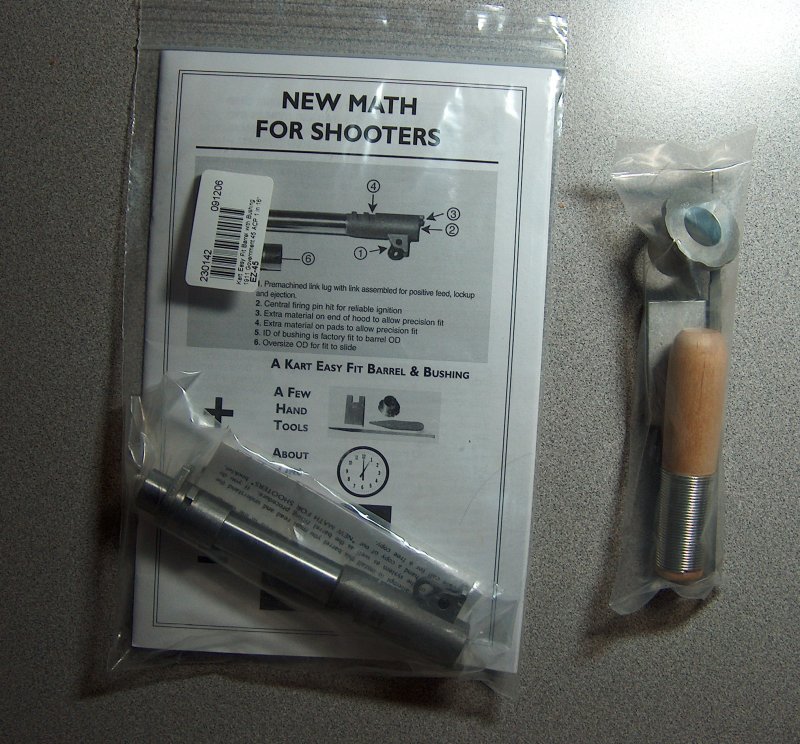
A new barrel is in the bag.
Above may be seen a brand-new Kart EZ-Fit barrel and barrel fitting kit as they appeared shortly after being unwrapped under the Christmas tree. (I have the best wife in the world.) Sharp-eyed observers will note that the enclosed pamphlet claims it is possible to fit this barrel in about an hour. I'll concede that for someone who knows what he is doing, fitting a Kart EZ-Fit may be the work of an hour, but those who are tentative, inexperienced, and/or uncoordinated (hi!), the entire process is far more involved.
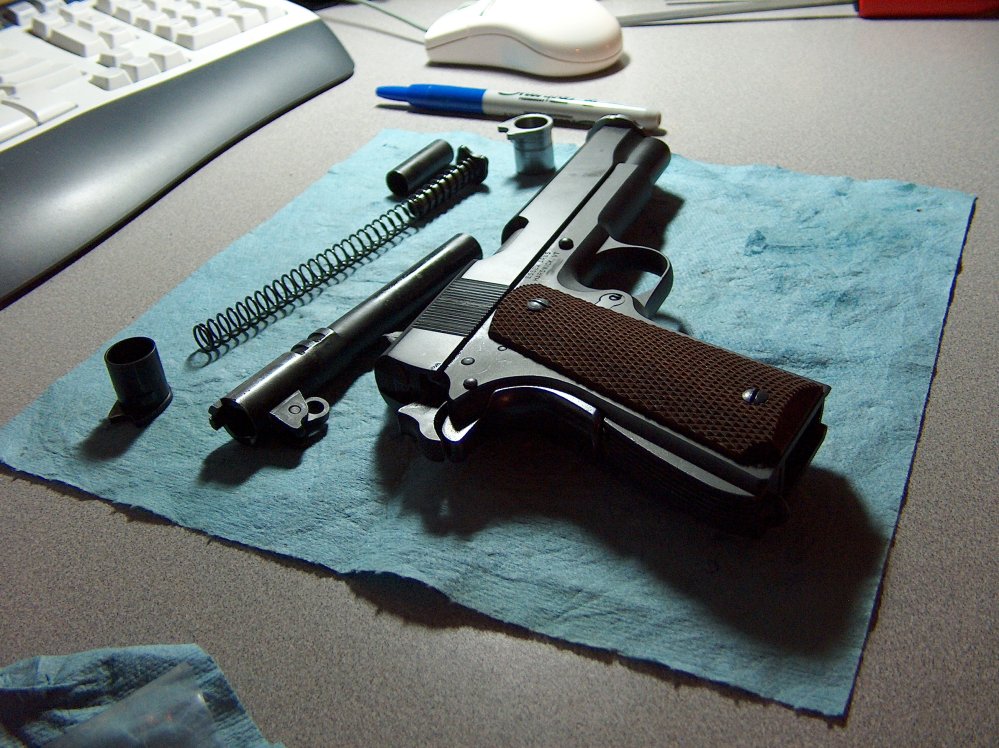
Dramatic barrel fitting photo.
So it was with equal parts undeserved optimism and entirely appropriate trepidation that I gathered all the parts for barrel fitting one evening and got to work.
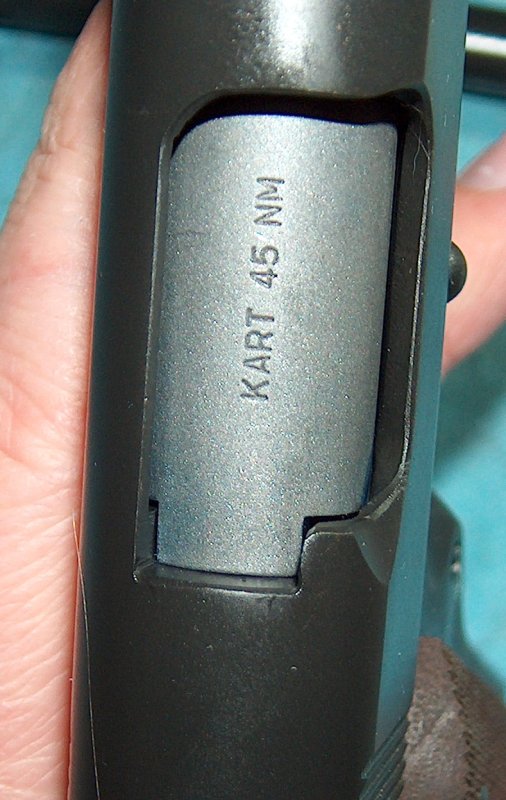
Barrel Hood

This must be why they call it an oversized hood.
The first step in fitting an EZ-Fit is to get it to go into battery. Our primary obstacle here is the fact that the hood is too large to fit into the appropriate recess in the slide, all the better to ensure solid lockup with minimal endshake. Both sides of the hood must avoid touching the sides of the recess when going into battery, otherwise the barrel will be forced onto the lower lug on the opposite side of the barrel from where the hood makes contact. This had never occurred to me before fitting a barrel, but there's a somewhat counterintuitive relationship between the barrel hood and the lower lugs: What happens on one side of the hood happens on the opposite side to the lugs. If one side of the hood jams against the slide, the lower lug on the opposite side will not be able to rise up evenly with the other lower lug and will jam against the slidestop pin. Conversely, if for some reason the barrel doesn't rise into battery in a symmetrical fashion, the barrel hood will reveal this by listing to one side or the other. (This last point wasn't apparent to me until I started filing the upper lug recess pads.)
After filing down the sides of the hoods, the rear of the hood was still too long to permit the barrel to go into battery, so that had to be filed down just enough to let the barrel drop into lug engagement. During the process of hood shortening, I ran into additional binding on the side, which I corrected. At first I was worried that I'd removed too much material from the sides of the hood until it occurred to me to compare it with one of the drop-in barrels: The hood width was actually a bit wider than the drop-in, which was a relief. This wouldn't be the first time I ran into issues due to being paranoid about removing too much material.
The fitted hood.
On a completely non-gun-related note, as I was filing on the barrel into the night I kept catching myself humming, "Let it Snow" under my breath. I packed up the parts and tools, turned around, and saw through the glass door that the backyard had somehow picked up three inches of snowfall. Spooky. I also saw that it was late at night, so I left the lug fitting for the next day.
Upper Lug Engagement
After a fun day of driving over icy hills better suited for bobsleds than sedans, what could be more relaxing than some soothing barrel fitting?
Relaxation equipment?
Brain surgery, for one; or maybe some light demolition. Nonetheless, I was determined to continue work on the Kart. Getting the upper lugs to full engagement was next, inasmuch as I'd filed the barrel hood back enough to permit tentative lug engagement.
Or had I? The first time I tried to close the slide on the new barrel, it showed no upper lug contact at all, indicating a failure to go into battery. The hood was binding against the breech face while cycling; I still hadn't removed enough material. A few minutes of filing later, the upper lug pads started to show contact.
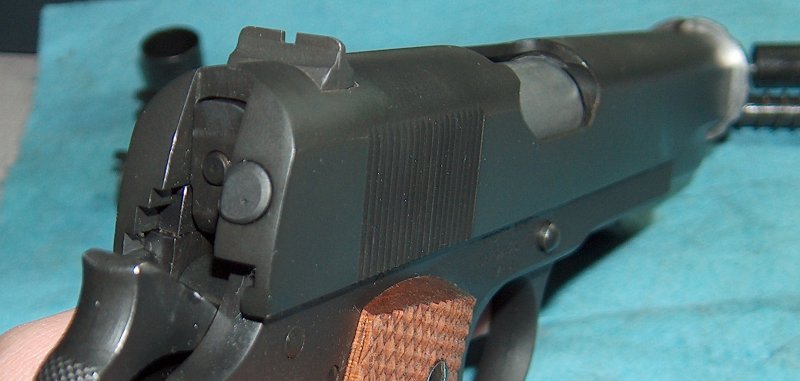
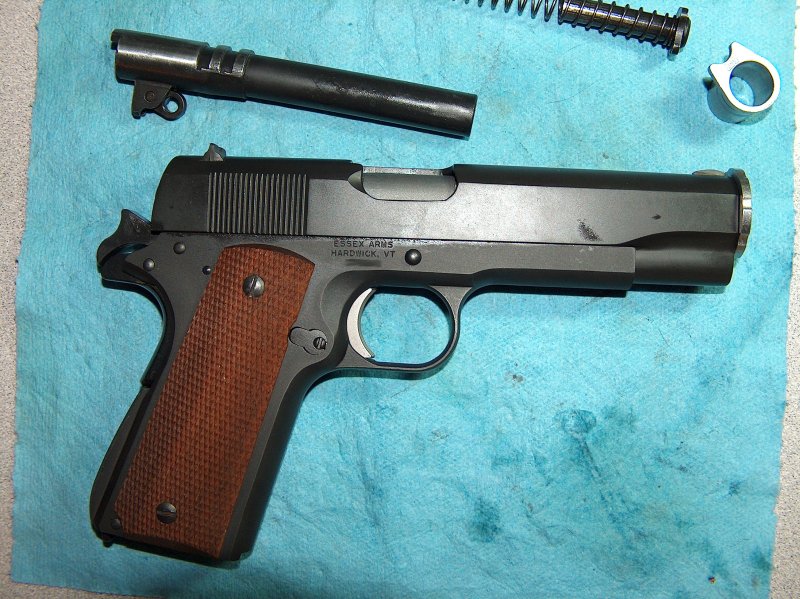
Like a dead flashlight, it's out of battery.
Verifying upper lug engagement is done by assembling the gun with the barrel to be fitted and filing down the pads on the upper lugs until the gun will go into battery, all while ensuring the the lower lugs make even contact with the slide stop pin. The funky bushing used during this process is a bench bushing, designed to be easy to insert and remove because you'll be disassembling and reassembling the gun about 6,000 times.
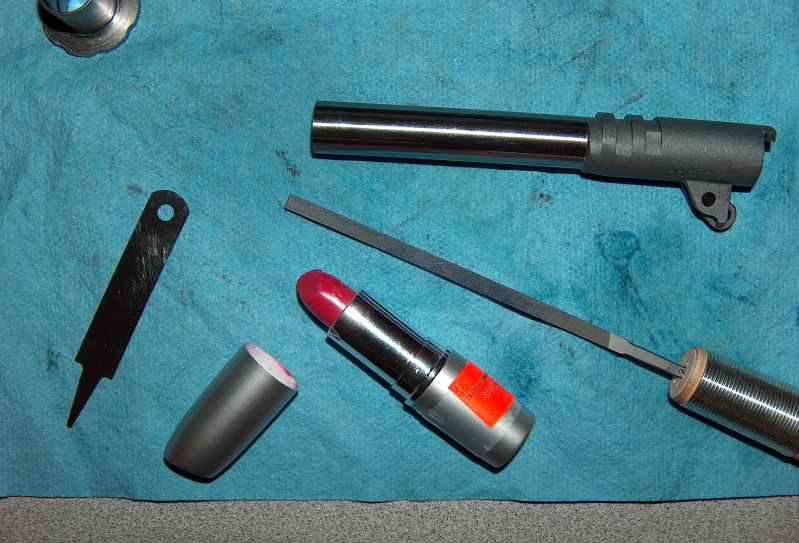
Precision barrel fitting equipment.
I should also probably explain how I'm detecting lug pad contact. Real metalworkers would have used contact marking fluid, but for the amateur on a budget lipstick from the Pay-Less discount cosmetics bin is easier to find, cheaper in cost, and far more humiliating to purchase. In fact, lipstick has one small advantage over contact fluid, in that it can be built up slightly so that near-contact is visible. It also cleans up relatively easily and makes your lips look full and luscious.
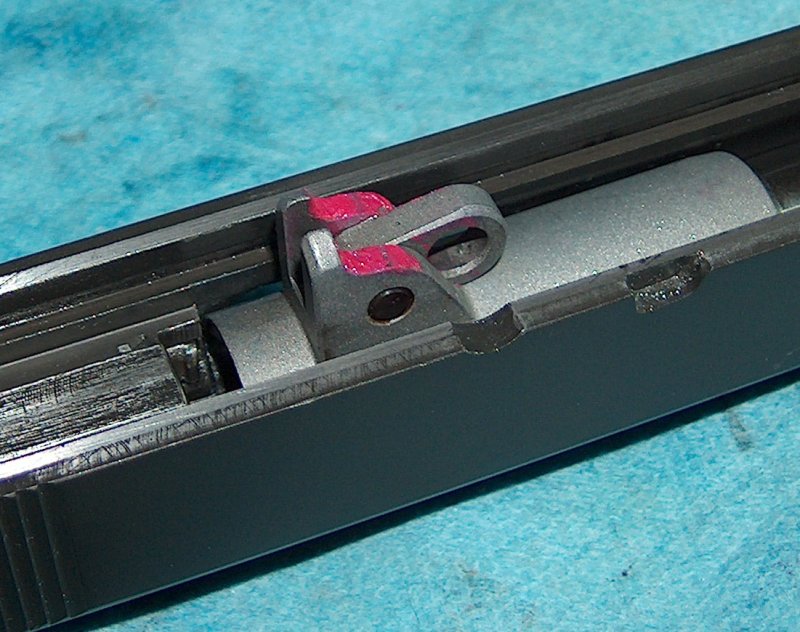
First contact.
Using the lipstick on the upper lugs showed which pad was seeing more contact, thereby indicating which one needed to be filed in order to bring the barrel up more. Additional clues used while raising the barrel included watching how the hood moved into battery; if the lug pads were unevenly filed, the barrel hood would lean to one side as the barrel rotated and lifted up on one of the lower lugs.
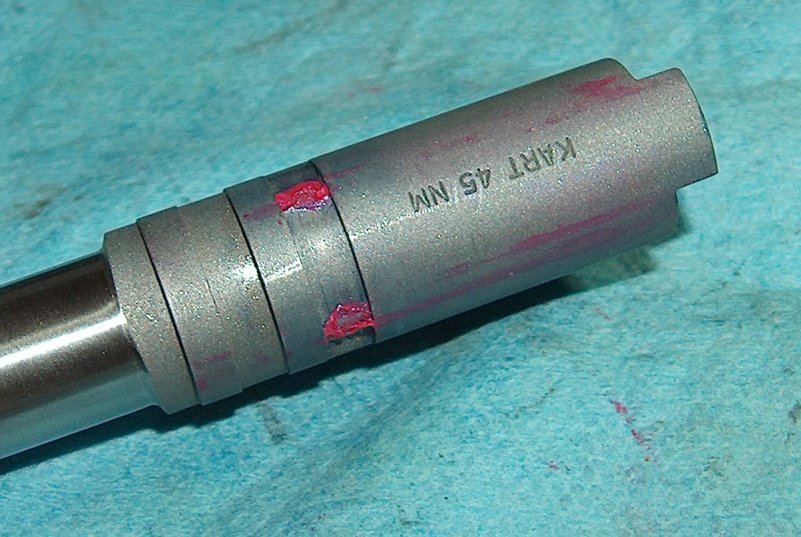
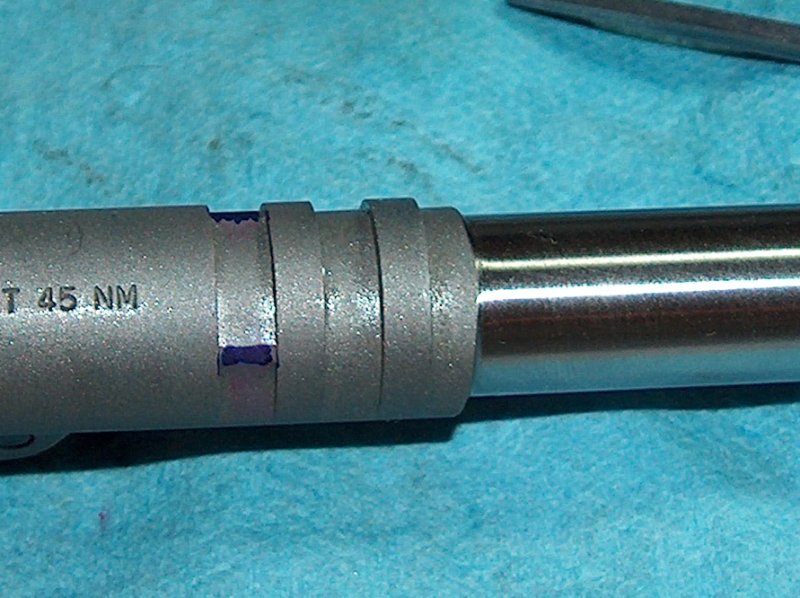
Speaking of lower lugs, those also saw some lipstick. What I was looking for here was even, symmetrical contact marks from the slide stop. Just like the sides of the barrel hood and the opposite lower lugs are related by their axial influence on each other, vertical lug engagement, front/back contact between the lower lugs and the slide stop, and in-battery position of hte slide are all related by the curve of the lower lugs. As the 1911 goes into battery, the barrel rides up the slide stop on its lower lugs. Because the Kart barrel has the raised pads in the first lug recess, the pads make hard slide lug contact before the barrel has lifted enough to let the slide stop pin clear the curve of the lower lugs, preventing it from going into battery and leaving a distinctive mark on the lower lugs:
Lug line.
As the pads are filed down, the barrel can rise higher, and the slide stop pin can move farther back. The goal is to let the barrel raise just high enough to let the slide stop pin contact the rearmost part of the lower lugs' feet. This creates an interference fit that locks the barrel into position in three dimensions. Vertically, the barrel is held between the pads on top and the lower lugs on the bottom. Front-to-back, it's held in battery by the recoil spring pressing the lower lugs forward against the slide stop and the barrel hood just barely touching the breech face. Horizontal engagement is maintained by the sides of the hood, the pads on top, and even slide stop pin contact with both legs of the lower lug.
Note that all of these contact points assume that the bushing is holding the barrel tightly and that the barrel is being fitted for maximum accuracy. As the contact points open up and the bushing gets looser, slop becomes possible and the amount of consistency in lockup decreases.
Enough theory! More filing!
To ensure I was filing the lugs evenly, I painted them with a Sharpie to reveal any unevenness. This didn't prevent me from making a fairly sloppy job of things, but at least showed me that I was doing so.
Marked for filing.
As I filed down the pads, the barrel rose and the gun went farther into battery. It was really neat to watch the hood's progress up the first slide lug, although it didn't move quickly enough to be dramatic.
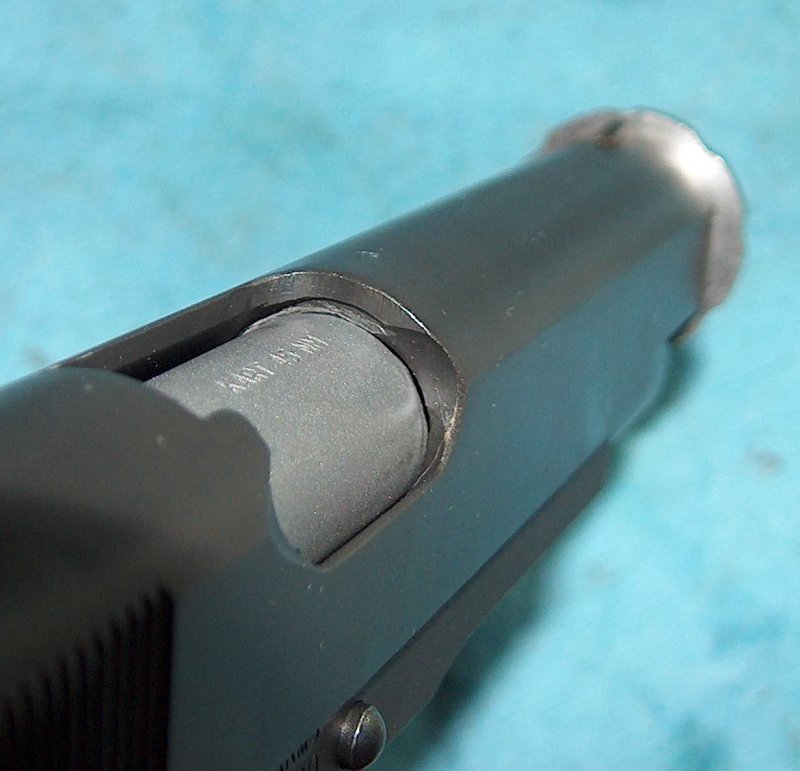
Rising to the occasion.
Part of the reason for the slow progress was the tentative way I proceeded. This was exacerbated by the laborious procedure: Coat the pads and lower lugs with lipstick, assemble gun, push firmly as far into battery as possible. Disassemble, note any uneven contact points, remove lipstick from pads, apply marker, let dry, file, and repeat ad nausium.
At long last, the lower lugs showed contact on the front of the feet and the barrel's vertical engagement was quite impressive. Still, the slide was slightly sticky going into battery, indicating that the lower lugs were binding on the slide stop pin. This confounded me for a while, but turned out to be another case of not removing enough material. (Still, it's better than the opposite extreme.) The fix here was to remove a fractional amount of material from the upper pads and lap the lower lugs to the slide stop pin with a slurry made of bore paste and oil.
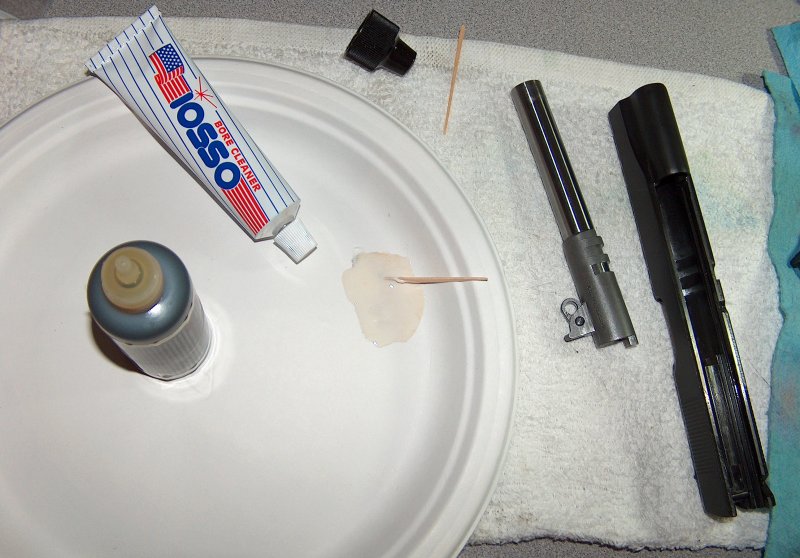
In a slurry to get things fitted.
Even after doing this, though, some stickiness still persisted. I was wracking my brain in consternation until I noticed that the bluing in the upper section of the breech face was worn off: The barrel hood was still too long and was binding against the breech face. For the third time, I removed a little more material, fixing the stickiness for good and produced one smooth-cyling barrel. It just goes to show the degree to which symptoms may be caused by parts that seem completely unrelated to the problem.
Bushing
I'm going slightly out of order here, because final fitting required the match bushing included with the barrel; however, the bushing also required fitting to the slide due to its enlarged outside diameter. FYI, trying to remove a stuck bushing from a slide is an awesome way to rip off any extra fingernails you don't need anymore. When fitting a bushing, always do so with the barrel inserted so that if the bushing gets stuck you can use the barrel to pull it out.
Turning down the outside diameter of a bushing by hand is indiscribably tedious and impossible to do evenly. After several hours of futile work, I yearned for a lathe. If only I had some tool capable of inducing rotary motion! Truly, this problem would be more easily solved if I had some sort of...rotary tool.
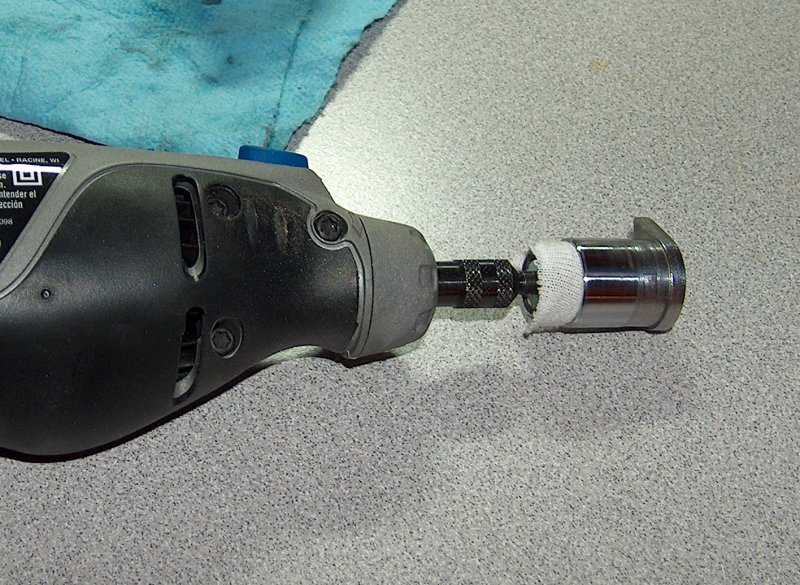
Precision gunsmithing strikes again.
Ironically, a Dremel acted as the solution to a 1911 problem instead of being the cause, as is usually the case. I used my Dremel's sanding drum wrapped in a scrap of cloth. The bushing, if carefully wedged onto the tool, rotated with almost no eccentricity, permitting the use of small files and strips of sandpaper and speeding up the reduction of its outside diameter by several orders of magnitude. I stopped reducing the outside diameter when it reached the point of being able to be inserted with a bushing wrench, then coated the interior of the slide with lapping compound. A few minutes of lapping the bushing to the slide loosened up the fit until it was capable of being inserted and removed by hand. Unfortunately, it also removed the parkerization from the front of the slide due to friction with the bushing wrench; some cold-blue fixed this up after cleaning off the lapping compound.
While I was at it, I also cold-blued the bushing. It now contrasted less with the slide, but my intent was not purely cosmetic: Both the slide and barrel were in the white. The barrel itself could be coated with oil inside and out, and a very thin coat of grease maintained atop the exposed hood. The bushing, however, was exposed to the elements. While cold-bluing isn't especially good at preventing corrosion, it's an improvement over no finish at all.
Finish Reaming
The barrel and bushing were fitted...but the chamber still had a slight taper. In and of itself, this isn't an immediate problem; even though .45 ACP is a straight-walled cartridge, a good taper crimp will permit rounds to feed even in a tapered chamber. However, a tapered chamber can have deleterious effects on feed reliability, so it behooved me to have it reamed out.
There was only one problem: I didn't know of any gunsmiths in my area other than the one who'd worked on my last barrel, and there was no way I was letting him get his claws on my Kart barrel. I posted on the M1911.org forum asking for recommendations for local gunsmiths and received several generous offers to ream the barrel for the cost of return postage; however, one of the posters with whom I'd corresponded for some time, Lazarus, turned out to be local to the area. He offered to provide some pointers and let me use his Clymer finish reamer, so I jumped at the chance. He met me at my garage, where I had put my awesome woodworking skills (second only to my incredible gunsmithing aptitude!) to work building an impromptu barrel vice:
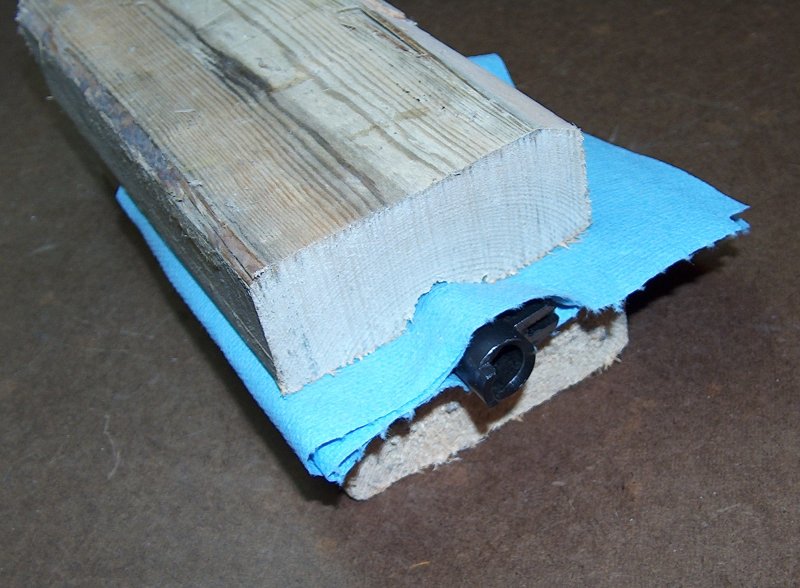
Precision woodworking.
I first practiced finish-reaming the chamber on the Roto barrel that came with my parts kit so that any "learning experiences" would not ruin the expensive barrel. I needn't have worried, as the process is much easier and less nerve-wracking than anticipated.
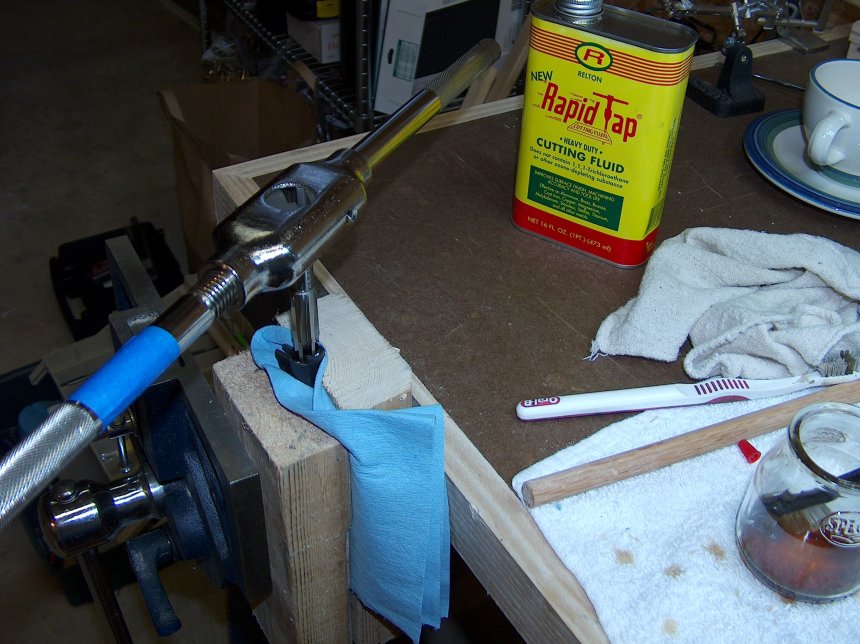
Tap that barrel.
The reamer is fitted to a tapping wrench, then coated with tapping fluid and inserted into the chamber. Some people talk about "dropping" a reamer into the chamber, but I can only assume that's a technical or colloquial term, since reamers are too expensive to just toss around.
Turning the reamer produces an interesting sensation as the blades carve chips of metal off the interior of the chamber. These chips show up on the blades when removed, and indicate which part of the reamer is doing the cutting. You can instantly tell when the taper has been removed from the chamber: The resistance in the wrench handles drops dramatically as the reamer stops cutting the edges of the chamber and starts biting into only the front of the chamber. At this point, the reamer is lengthening the chamber.
This is where I started taking it extra slow, checking headspace after every turn of the wrench to ensure I didn't make the chamber too deep. I didn't go through this laborious process for the test barrel, but made sure to take the time for the Kart, stopping as soon as I hit a smidgen over mid-spec. (I was aiming for reliability over accuracy.)
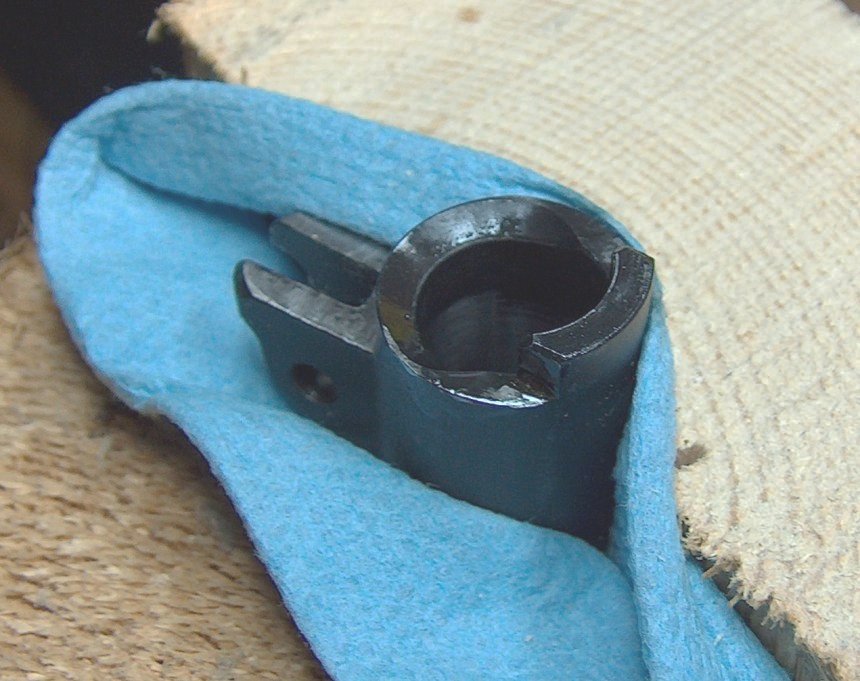
The ream-ains of the chamber.
As the above photo shows, a noteworthy amount of material is removed when finish-reaming. Although I didn't take any photos of the Kart barrel's reaming, the process worked every bit as smoothly, with one exception: The Kart's steel was noticeably harder than the Roto barrel's, requiring slightly more effort to turn the tap wrench.
The final turn of the tap wrench concluded the formal barrel fitting process. I say "formal" because this would not be the last time I had to work on the barrel. Despite this as-yet-unknown metalworking looming unseen over my head like a ninja with an anvil, fitting the barrel to the gun had been a long but ultimately rewarding endeavor. I thanked Lazarus for the advice and use of his tools, then spent the next four hours trying to get my hands to stop smelling like tapping fluid.
email: hidi.projects at gmail.com