A Million Little Pieces
I've Been Framed
Guts and Glory
Pins and Needle Files
My Luggy Day
Searious Issues
Sliding Into Position
All Together Now
Spacing Out
Wear to Go from Here
Barreling Ahead
Breech of the Piece
Starting Out with a Bang
Round Two (hundred)
The Kart of Barrel Fitting
Fed Up
Safety is a Snap
Dispatches from the Front
Pulling Through
The Final Part
Lessons Learned
Frequently Asked Questions
Errata and Clarifications
More articles
Wear to Go from Here
While waiting for the new barrel, I decided to look at the wear patterns. There had been enough A-Zoom aluminum snap caps hand-cycled through the gun to show where parts were wearing on each other and I wanted to ensure that all of the wear was superficial and wouldn't progressively turn into peening.
First up was the slide stop and the corresponding notches in the slide. I wasn't worried about the slide stop itself, as a slidestop heat-treated to spec will be very hard, much harder than the slide itself. If anything is going to be damaged by an improperly shaped slide stop, it will be the slide.
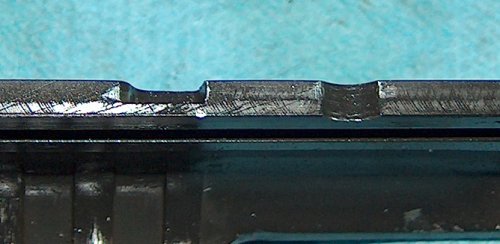
Stop wear.
At first glance, the slide in the above photos doesn't look too bad, but bear in mind that this photo was taken after a relatively small number of cycles. There's some peening starting around the edge of the disassembly notch, and the locking notch is showing a small amount of deformation near the front and rear. Nothing world-shattering, but worth some attention.
Let's take a look at the guilty party.
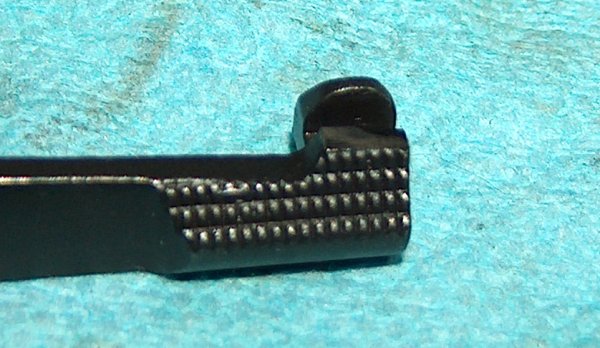
Wear did that come from?
The first thing I spotted when taking a look at the slidestop was that the top was wearing unevenly, which meant that when I filed it down to fit the slide I'd not kept the top completely level. Lesson learned: When attempting to evenly file a flat surface, use a solid backing for the file or stone.
As it happened, my filing of the surface was also the source of the peening. When the top of the slide lock was lowered, it also had the effect of removing the radius on the front and rear edges. (The change to the angle of the top also probably had something to do with it.)
To fix things up, I evened out the top of the slidelock and added tiny radii to the front and rear. The front radius was especially difficult given the hardness of the metal and the limited space in which to work.
Was I done with the slidestop? Not quite:

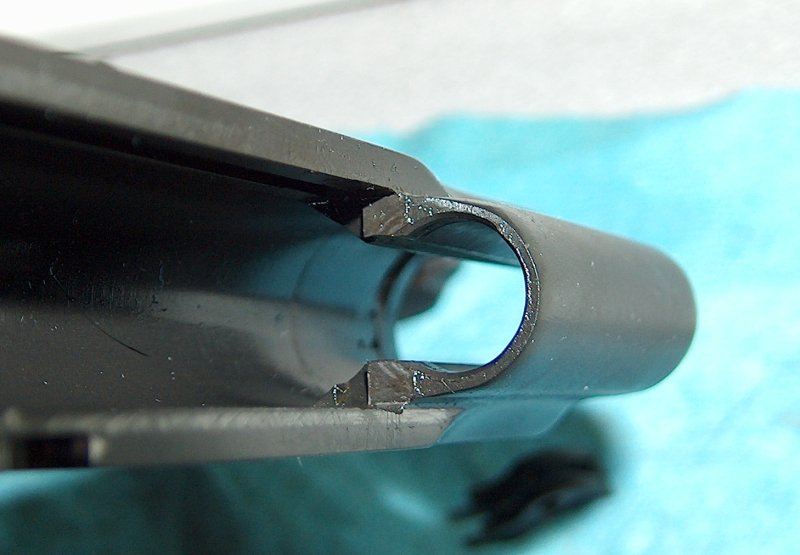
A pair of idiot marks?
The "standard" idiot mark is my fault; I defy anyone to assemble and disassemble a 1911 twenty times in an hour and not ding anything. However, the small gouge right before the plunger tube can't be laid at my feet. This was caused by the rear corner of the slidestop biting into the frame itself. To fix it, I relieved the stop a bit so that it cleared the frame, then rounded the rear corner just a little, so that even if the stop contacted the frame again it wouldn't dig in.
I was done with the slide stop, so I cold-blued it and turned my attention to a couple other worrisome points.
Ring around the rosies?
I'd noticed a faint ring near the front of the slide and was worried that the bushing might be shifting and deforming the interior of the slide.
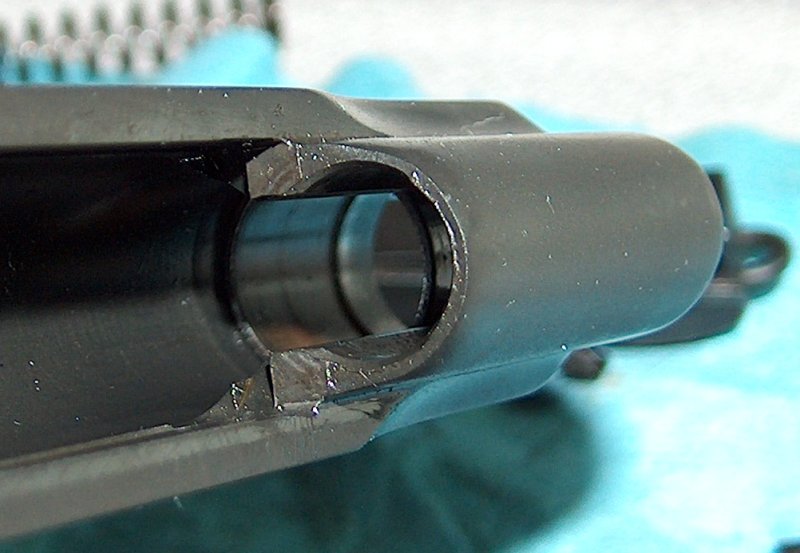
No beating around the bushing.
As it turned out, I was being silly because the bushing didn't even match up with the mark, which is probably a machining mark.
Finally, I noticed what appeared to be serious wear around the right front corner of the frame rail where it met the dust cover. This worried me a great deal because corners are highly susceptible to cracking; if something was bearing hard against that corner, it wouldn't bode well for the frame's long-term durability. However, the wear just didn't seem logical to me for some reason, so I looked closer. There was no corresponding heavy wear on the slide where it met that point in the frame at full rear retraction, nor was there corresponding wear on the other side. I had to haul out the magnifying glass before I realized what had happened: The A-Zoom aluminum snap caps had gotten lightly chewed up by all the cycling. A flake of aluminum had come off and somehow migrated forward. (Not surprising; if you've cleaned a 1911, you know there's nowhere fouling can't go.) The aluminum had been pounded into the corner by the slide cycling, so much so that it looked like raw steel and took a pick to remove. This was a somewhat silly false alarm, but the fact that the "wear" had instinctively felt wrong to me was heartening. Maybe I was learning something after all.
With the major areas of wear (weareas?) addressed, I still had to wait another two weeks before the Auto-Ordnance barrel arrived. You, however, need only click the link below.
email: hidi.projects at gmail.com